How To Clean The Indoor Unit Of A Split AC
- Here’s the main points for How To Clean The Indoor Unit Of A Split AC.
- You have an air conditioner – split-type
- Navigate the exact location of the indoor and outdoor units
- Start the cleaning process; turn off power source
- Remove air filters from indoor unit
- Check condition of the cooling fans. Blow the dust off the fins
- Detach drain pipe and blow air through it to remove dust and sticky material
- Turn of power source to the outdoor unit
- remove the clippers/screws binding the compressor unit and wash the fan-assembly
- Put the split unit back up, turn on power and check to see if the A/C is working perfectly
- Confer with the User-Manual to avoid unnecessary mishaps
Air conditioners are an essential component to keep places like a home or a business place set at the right temperature. More specifically, split air-conditioners are a common type of cooling system that exhibit a compact, ductless format. The inner unit usually looks like a long rectangle fit into a wall of your home, while the outdoor unit – the condenser/compressor – is a large metal box harboring back-end airflow elements. Read the article and learn how to clean the indoor unit of a split AC.

Any air conditioner – AC – is only as good as its inner workings, so always make sure to clean the indoor unit more frequently before eventually cleaning the outer component.
Indoor-Unit Service
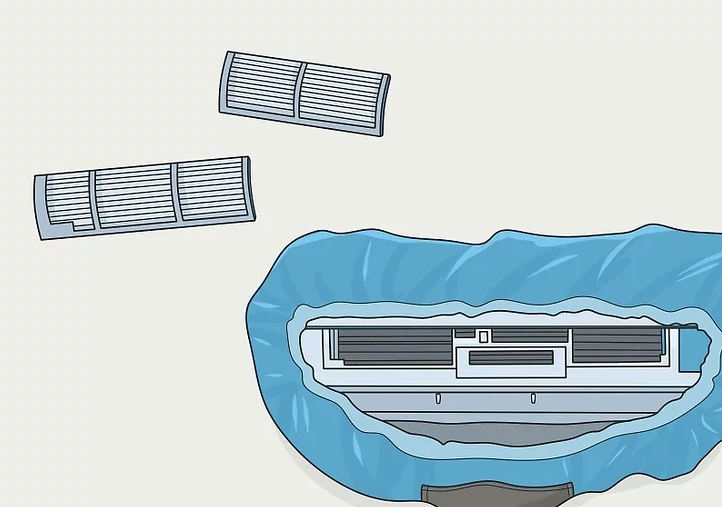
First things first: put a cleaning bag around the entire split A/C system. This prevents dust or any dirt material from reaching the floor. These bags come in cheap, so don’t be such a mutt and buy one!
Purchase a bag that comes with a cinch – holders – so you can easily loosen or tighten the indoor unit’s entire body. As an optional sorting, you can also use an empty trash bag in lieu of a specialty cleaning bag.
Turn off the power source and lift up the front panel.
You can find the appropriate circuit breaker or power source in your home and turn off power to the A/C before opening the front panel. Atypically remove latches on the front part of the split to lift it up and access the inside of the unit. Most machines have indoor and outdoor components, so make sure that power to the entire cooling system is turned off.
How To Clean The Indoor Unit Of A Split AC | Remove Air Filters
Upon opening the latches leading to the inside unit, you’d notice the long rectangular pieces at the front. They’re the removable air filters. Take them out by pressing a tab along the side of each filter, which then loosens and removes them with a little clicking sound.

First, shake the filters outside to remove any obvious dust and dirt before you start the cleaning process. If needed, wash the filters under running tap water until stubborn dust is completely removed. It’s recommended to just take the filters to a sink or large basin and pour cool tap water over them. If the filters aren’t that dirty, give them a quick rinse. If running water doesn’t help, use a sponge or cleaning pad to gently rub in a mild cleaning softener. Afterwards, simply rinse and leave the filter out in the open so as for them to properly dry up.
Note: If there aren’t any obvious tabs that open the front of your indoor unit, check the manufacturer’s guide for help. Do this at least once a month!
Next, blow the dust off of the cooling fans.
Add a thin, canister-like attachment to your air blower, and use it to release dust from the back of the indoor unit. The cooling fins look like a series of metallic lines that are snug against the back of the air conditioner. Make sure you blow air all over these sleek fins.
You may also opt to use a vacuum attachment; this is quite similar to using an air blower, but the only difference is that the dust settles inside a bin compartment of the vacuum cleaner.
When done with the metallic fins, move on towards the coils behind the A/C grill. Get a no-rinse evaporator cleaner – foam spray – and apply it to the coils. Let the product sit for at least half an hour. If you’re a rookie and have recently mustered up the confidence to clean a bit, here’s a neat trick to recognize the coils. These coils look like a connected mesh of rounded metal pieces that are visible across a blackish indoor compartment.

You can also purchase evaporating cleaners online. Try Daraz, Ali Express.
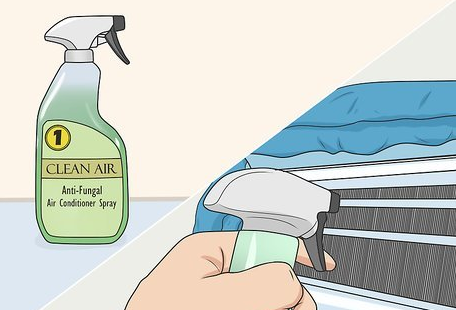
After getting this done, spray anti-fungal cleaner on the coils to remove mold. This helps prevent toxic particles and spores from growing in your appliance.
Coming Back To The Air Filters
Secure the cleaned-up air filters back in their original position. These freshened air filters ensure clean, cool air going through the air conditioner. Typically, they easily glide back into place, but double check your owner’s manual if you’re having trouble.
Clear Out Any Clogs In The A/C By Flushing Out Drain Lines
Avoid a drain-line clog by disconnecting the hose/pipe that separates the indoor and outdoor units. Use a pressurized flush kit to force through water down the drain-pipe. Make sure to let it dry for at least an hour before connecting it back to the indoor and outdoor terminals.
- If needed, feel free to flush water or a cleaning agent through the drain line both ways.
- You can purchase flush kits online that contain a pressurized nozzle.
Re-connect Power To You’re A/C And Check If Its Working Perfectly
Go to the circuit breaker or power source for the air conditioner and switch electricity back on.
- You can also stick a wire or a long piece of metal through the pipe to remove any clogs
- If your split A/C is still having issues, consider contacting a professional technician for help.
- Keep the cleaning bag in place after you turn the A/C on—there’s a good chance that the machine will be spitting out some dirty water. Wait until all of the waste has left the AC before removing and tossing out the bag.
How To Clean The Indoor Unit Of A Split AC | Moving On To The Outdoor Unit

Switch off power to the outdoor unit.
Since you’ll be rinsing off the fins of the AC with water, you wouldn’t want it to be hooked up to a power outlet. To be on the safe side, unplug the breaker from the power-source.
Use a brush attachment to vacuum the condenser fins. After removing dust and debris from the system, go horizontally and vertically in straight lines until the condenser looks all sparkly and clean.
Now, unscrew the grille from the top of the condenser. Use a wrench or a Philip’s screwdriver to remove bolts and detach the metal unit. Just as a precautionary measure, double check the manufacturer’s guide to confirm the safest way to take out the condenser fan.
Hose the fins and let the unit dry completely
You can also use a sprayer attachment to get a finer or stronger mist from the hose. Don’t apply to much water pressure on the fins; the fins – although metallic – are elastic and can easily bend if the pressure is too high.
Re-attach the displaced parts, turn the power back on, check to see if the system is working correctly.
And you’re good to go!


