A modern smartphone is a very powerful tool — over a thousand times faster than the computer used to fly man to the moon for the first time. While we use it to flick colorful birds at helpless pigs to pass our time and to document every bit of our lives, the little computer in our pockets is much more capable than we make it out to be.
The smartphone has already replaced dedicated digital cameras for many people’s photography needs. And while professional photo editing tools like Photoshop, Lightroom, etc. don’t really have a true mobile competitor yet, there are a number of apps that can help you replicate some of their best features; Snapseed being one of them.

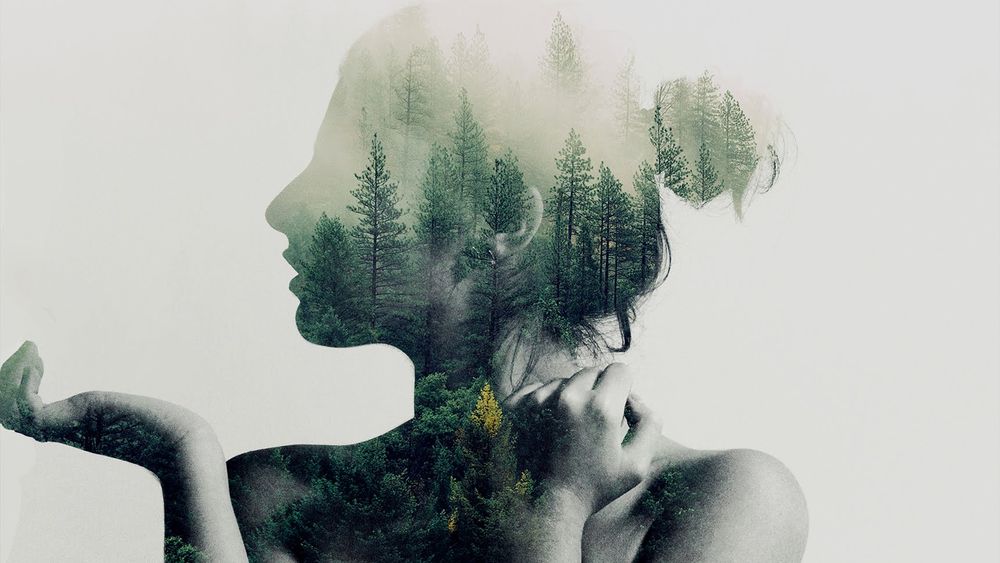
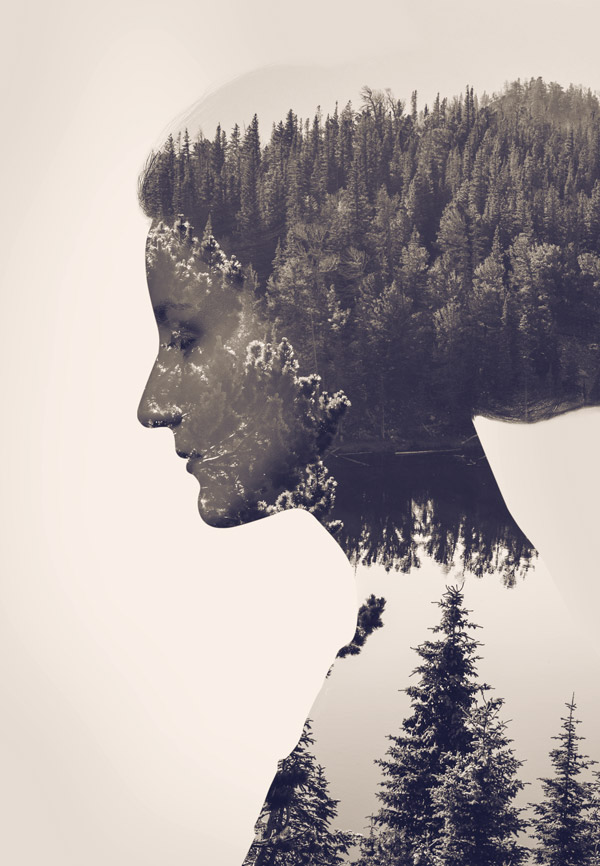
The double exposure effect shown off in the image above (more examples are at the bottom) has been created completely on a smartphone — from capturing the picture to editing.
Here is a tutorial on how you can replicate this effect on Snapseed, a popular mobile editor for Android and iPhone.
Download Snapseed for Android | iPhone
Capturing a Photo
This technique can work with any photo but there are certain things you need to keep in mind before attempting to create a double exposure out of it,
- Object: You need to pick out the object of your image — be it an inanimate object like a jar, a book, or a portrait of someone. (Hint: Selfies will look really awesome too.)
- Background: It will be easier if the background is white (or as close to white as it can get). While you can get a satisfactory result using a bit of extra editing by manually turning the background to white in Snapseed, an already white background will make the process much easier.
For the double exposure background that you want to apply, you can pick any image that you think suits your object — a beautiful scenery, a city skyline, the setting sun, etc.
Editing
Step 1:
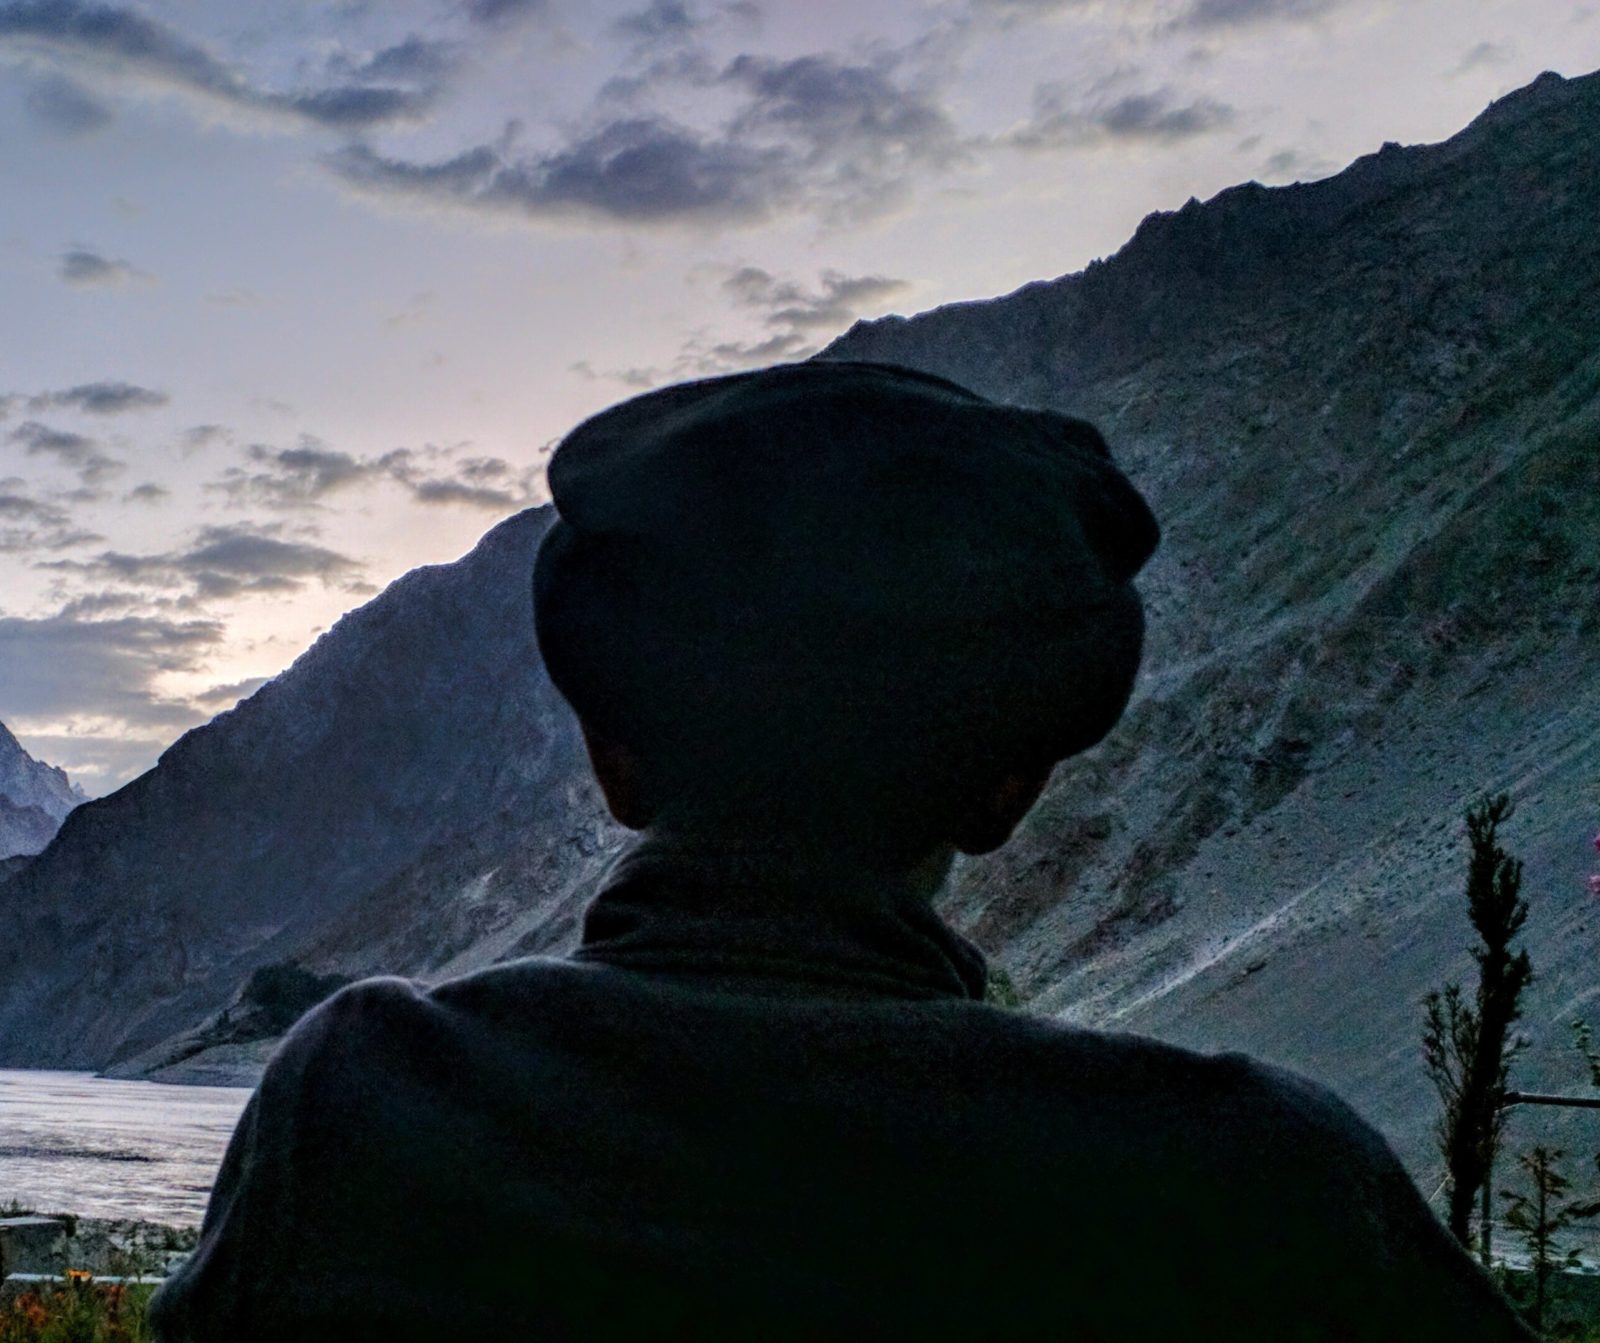
First you take the photo of your object — here I took this photo of my friend, wearing a Pakol, as he watched the sun rise over the beautiful town of Gulmit.
My object is his silhouette. I have intentionally taken an image where the background isn’t white so I can show how you can work around this using Snapseed. (If you have an image with a white background, you can skip to step 8 and save around 5 minutes of work)
Step 2:
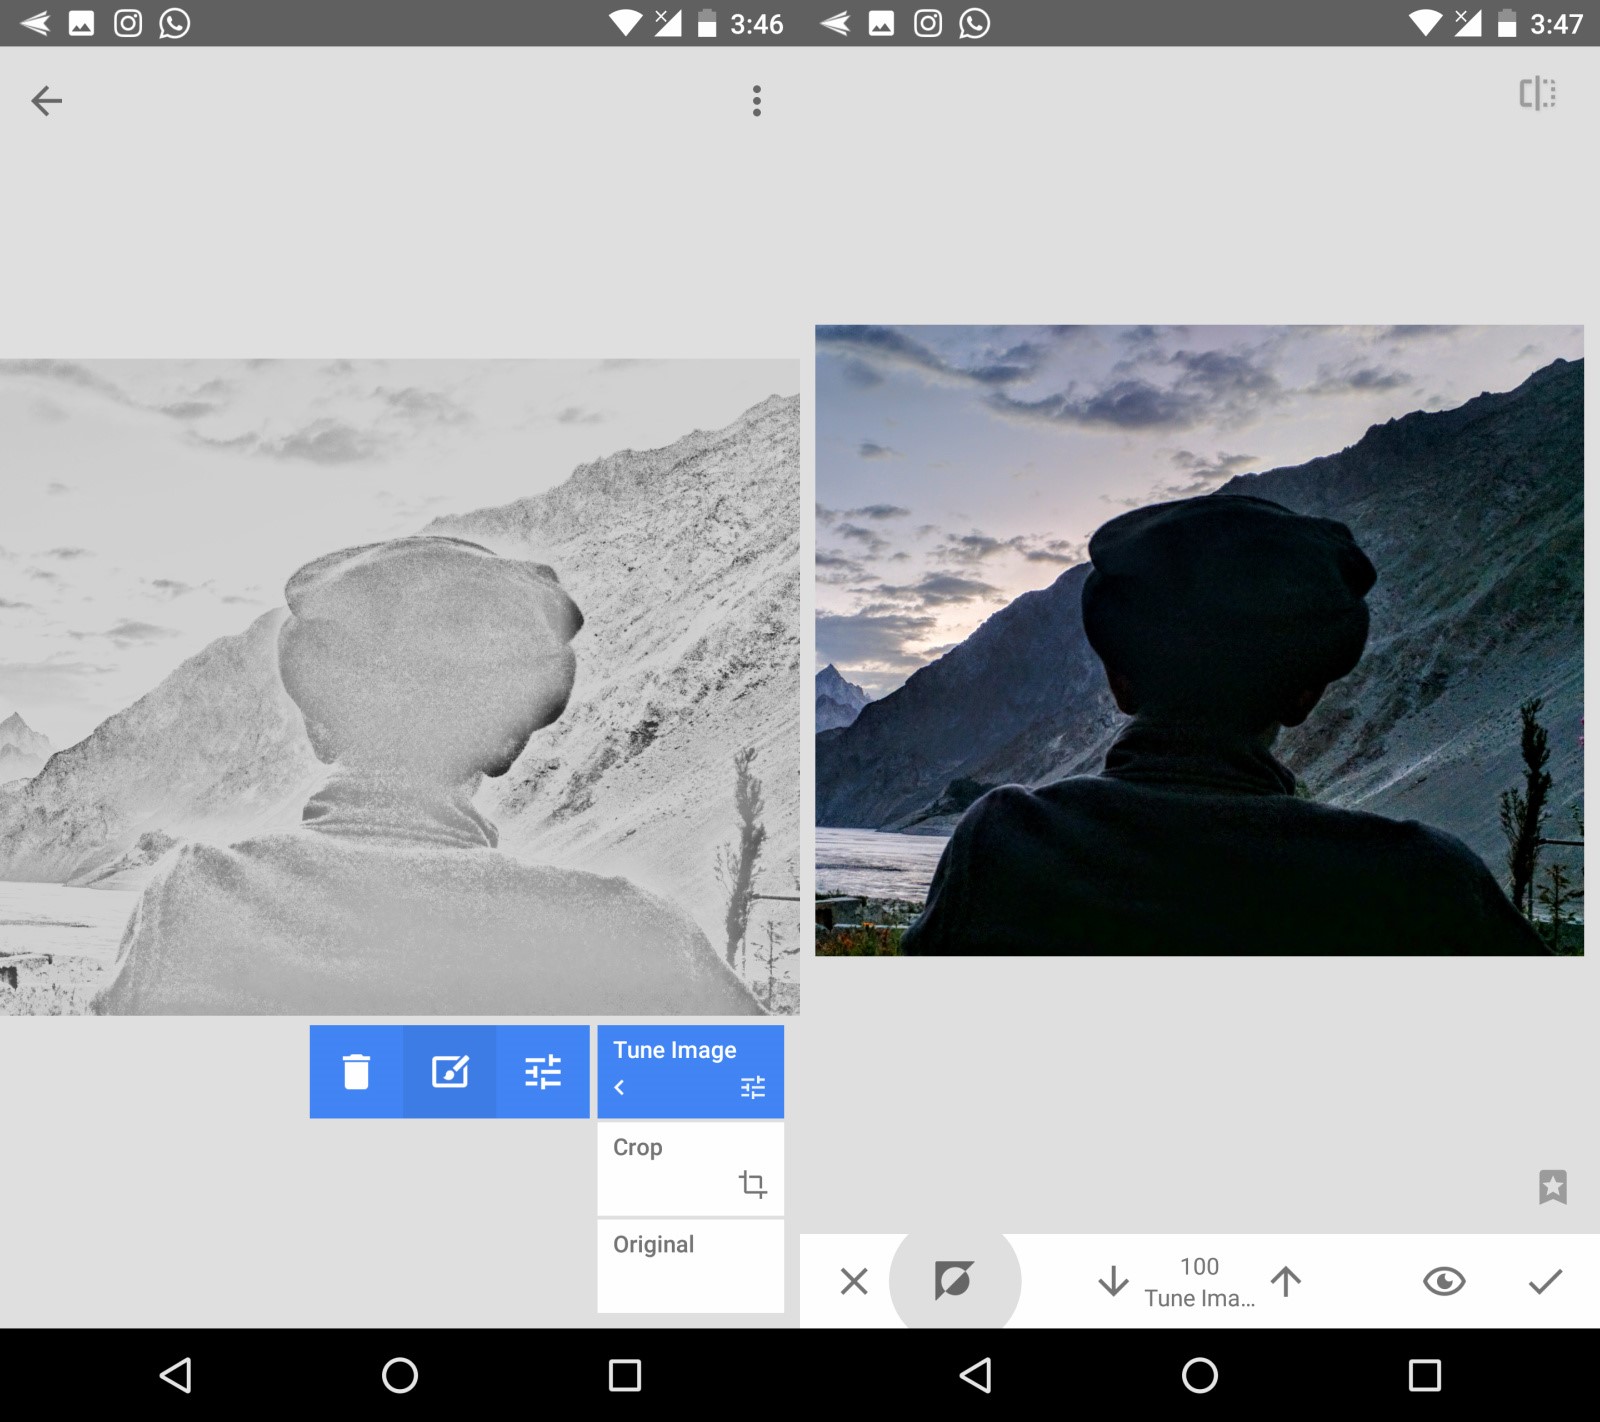
Open the Snapseed app on your phone and open this photo to edit. Then tap on “Tools” and select “Tune Image”.

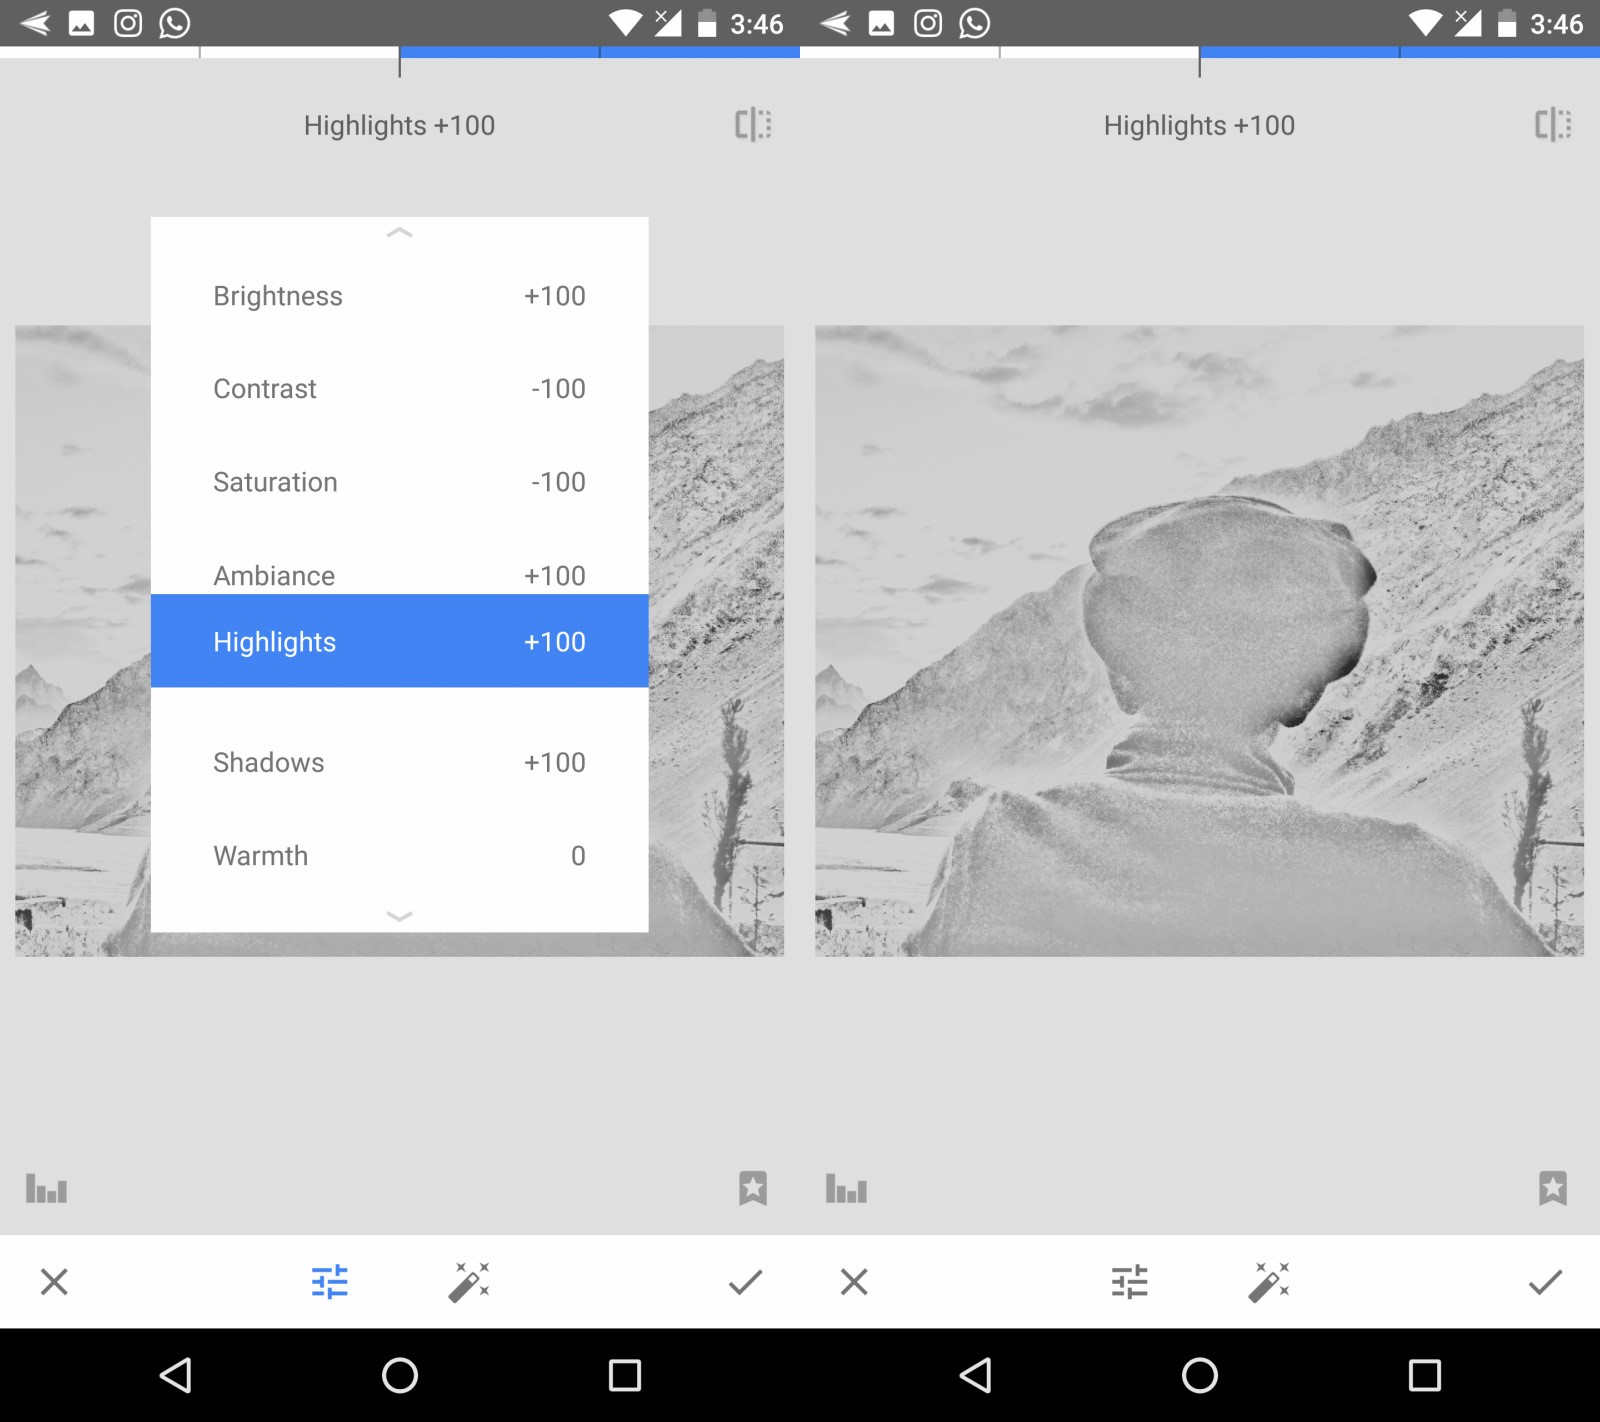
Step 3:
Now try to make the image as white as possible by tuning the settings. This is to convert the background to white (you will later retain the object to its original position).
Step 4:
Tap on the “check” on the right bottom corner. Now tap on the “arrow + stack” icon on the upper right corner and then tap on “View edits”.
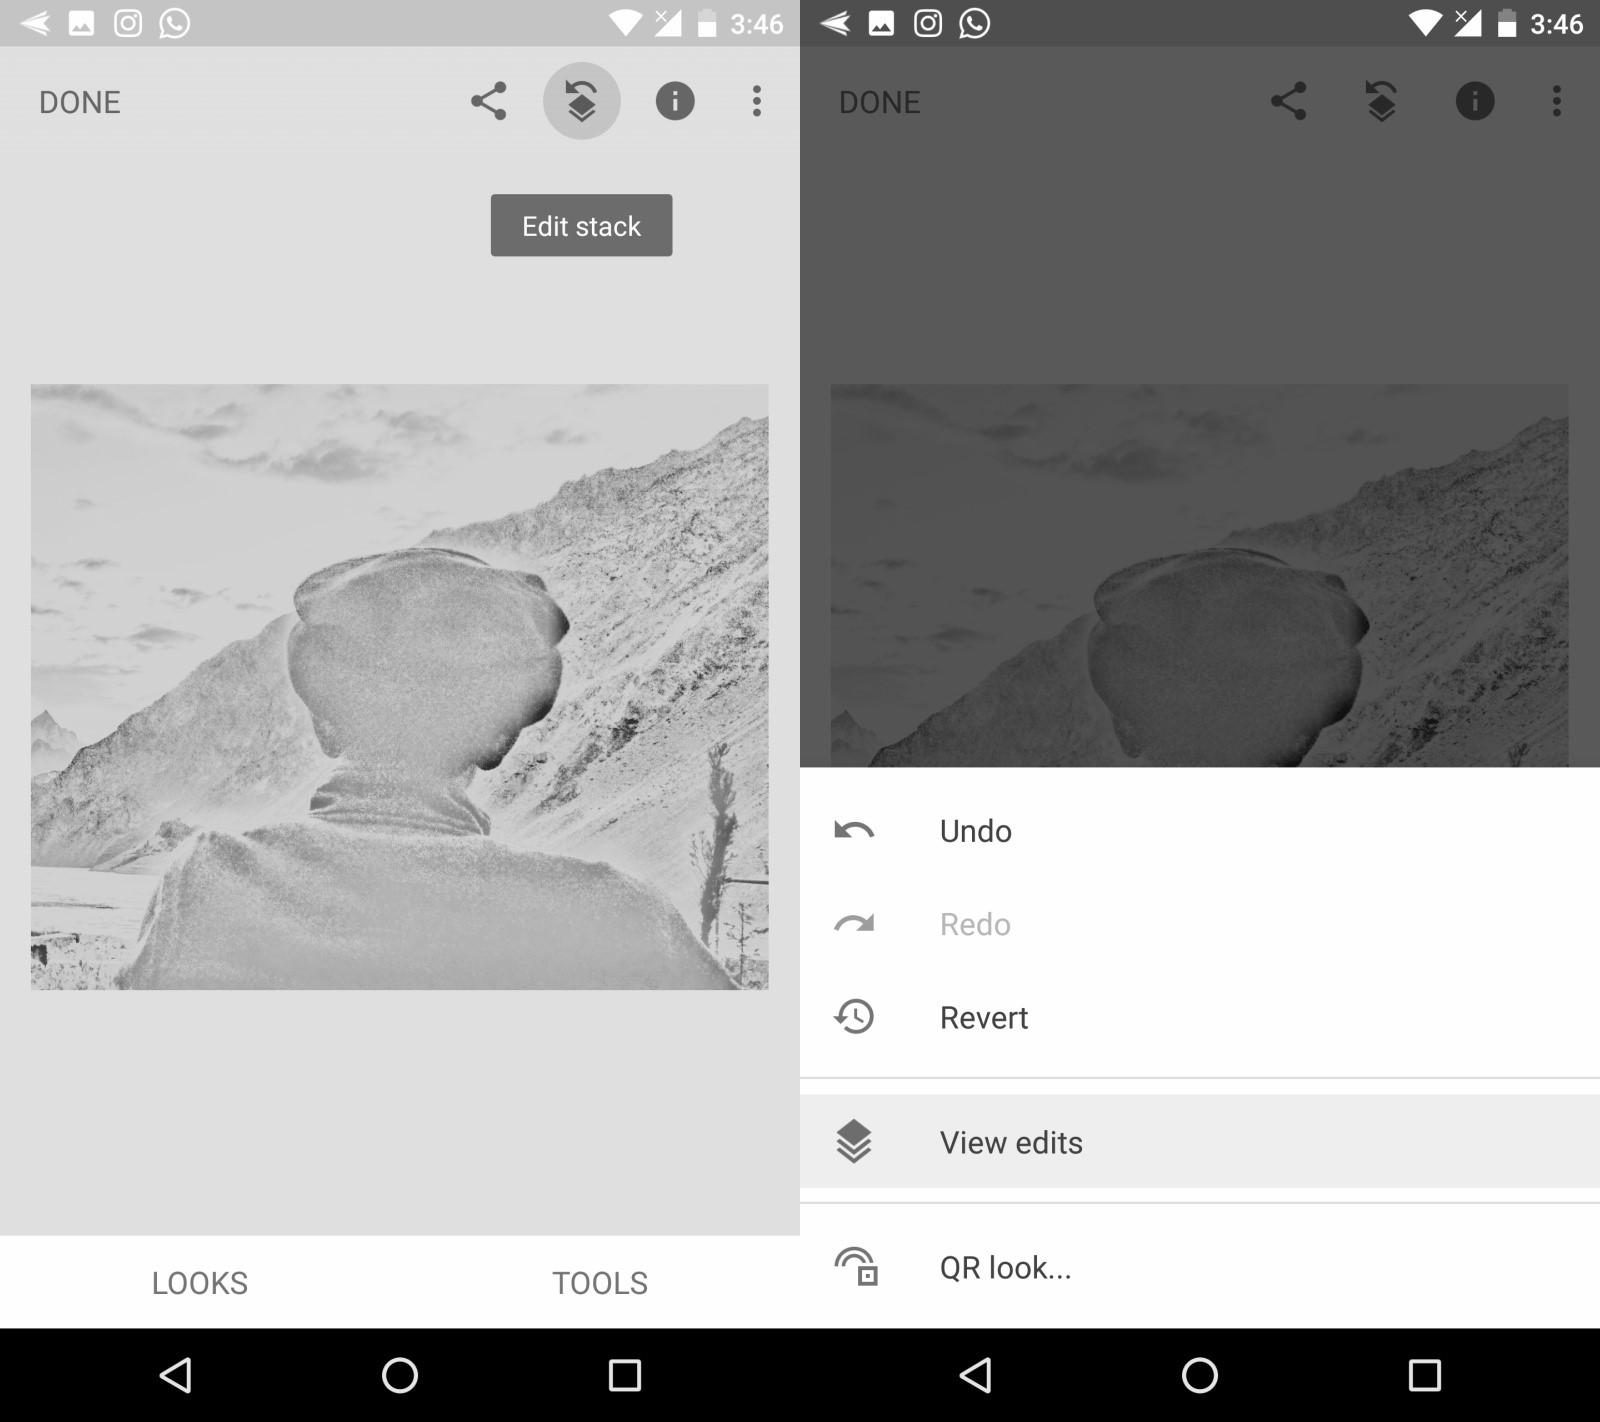
Step 5
This will let you see all the edits that you have made. On the right side, you will see the “Tune Image” edit you just made.
Click on it and you will see a list of options. Tap on the middle one with the brush icon. It will take you back one step, click on the little triangle and circle icon on the bottom left.
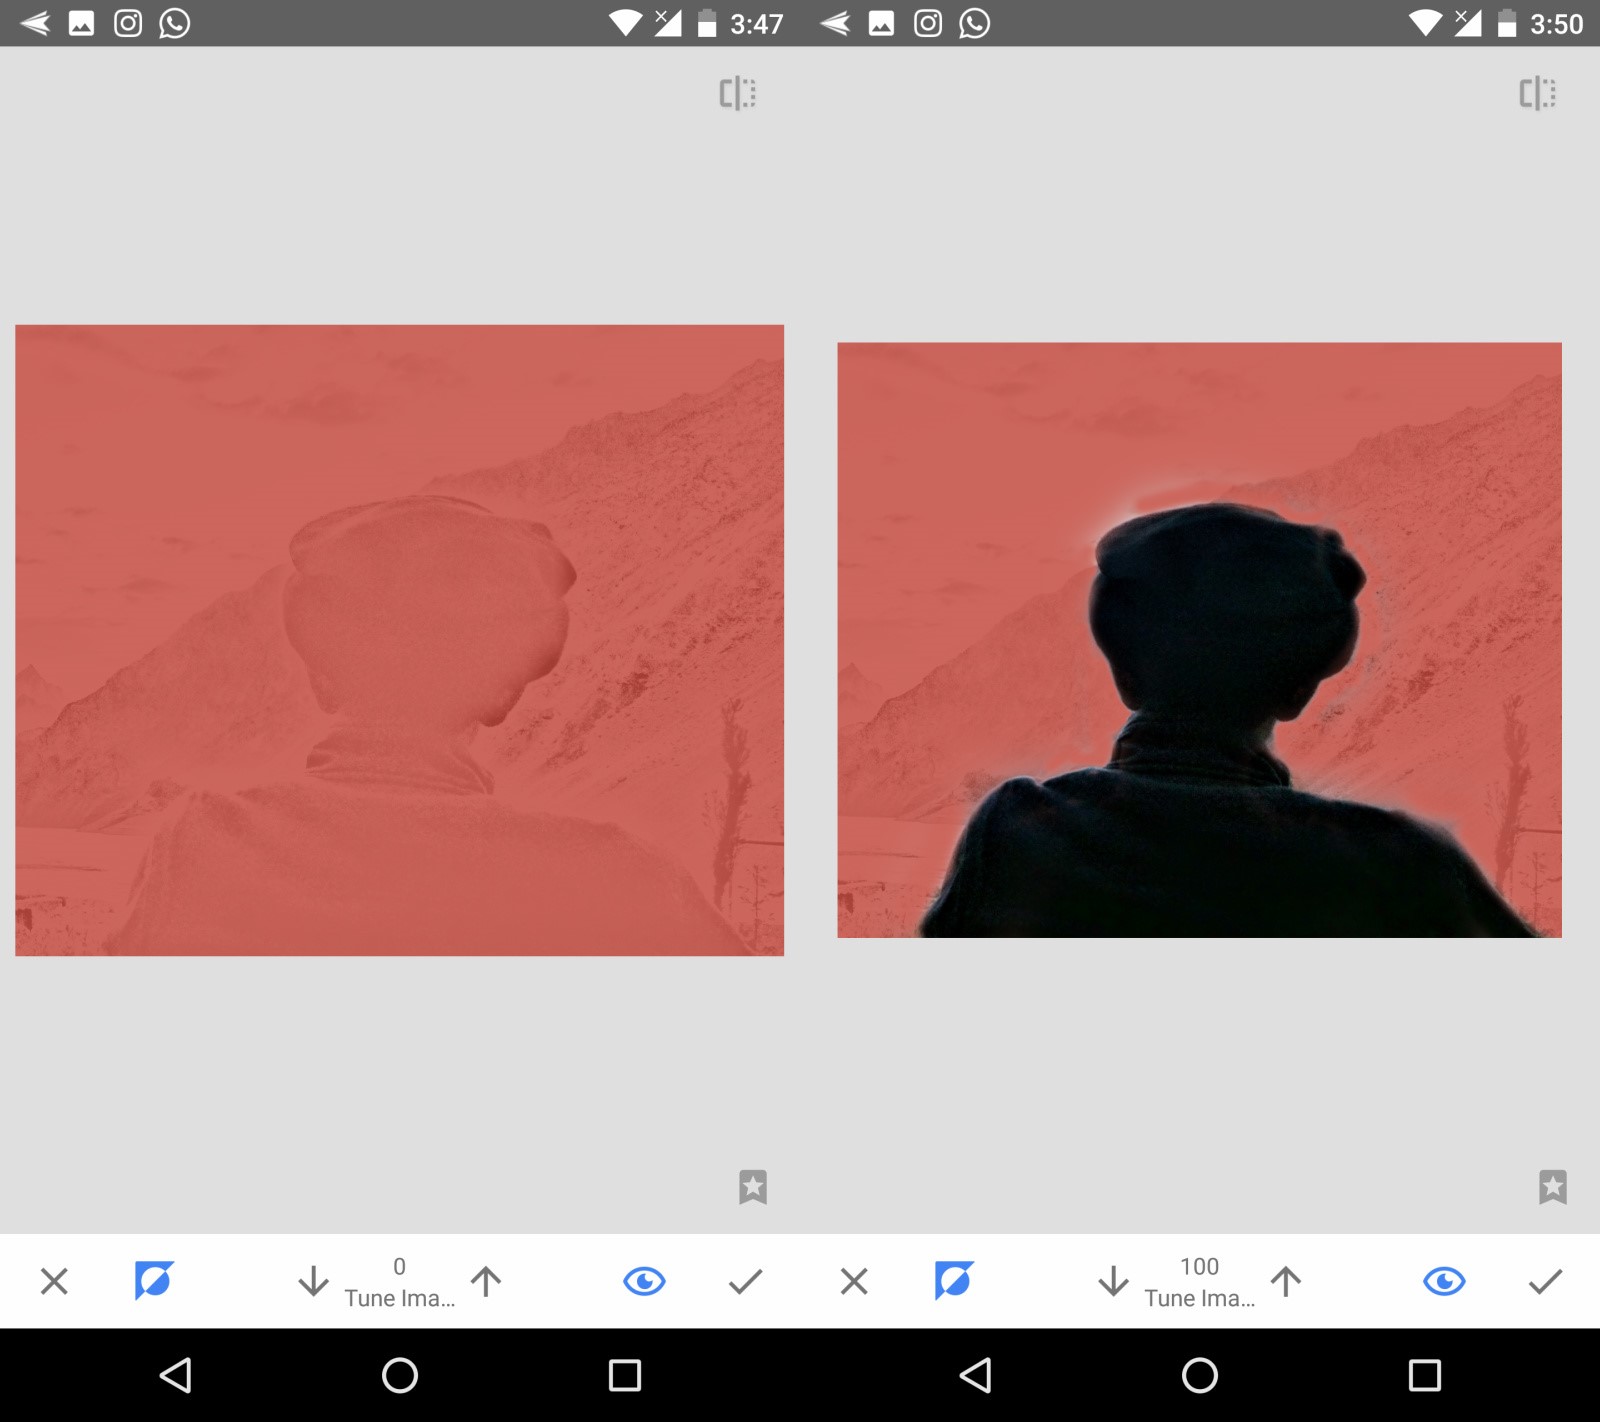
Step 6
Trace out your object with your finger to select the area where you don’t want the effect to be applied.
You can click on the eye on the bottom right corner to see where the effect is being applied in red highlight. (Hint: Zoom in using two-finger pinching to better trace the object.) You can use the arrows at the bottom to tweak the amount of effect you want to be applied.
Step 7
Once you are done tracing, click on the little check icon on the bottom right. Now you can repeat this whole process (from Step 3) to completely remove the background. This is the only time-consuming part of the process: removing the background. You can also use other tools like Healing or the Brush to accomplish this.
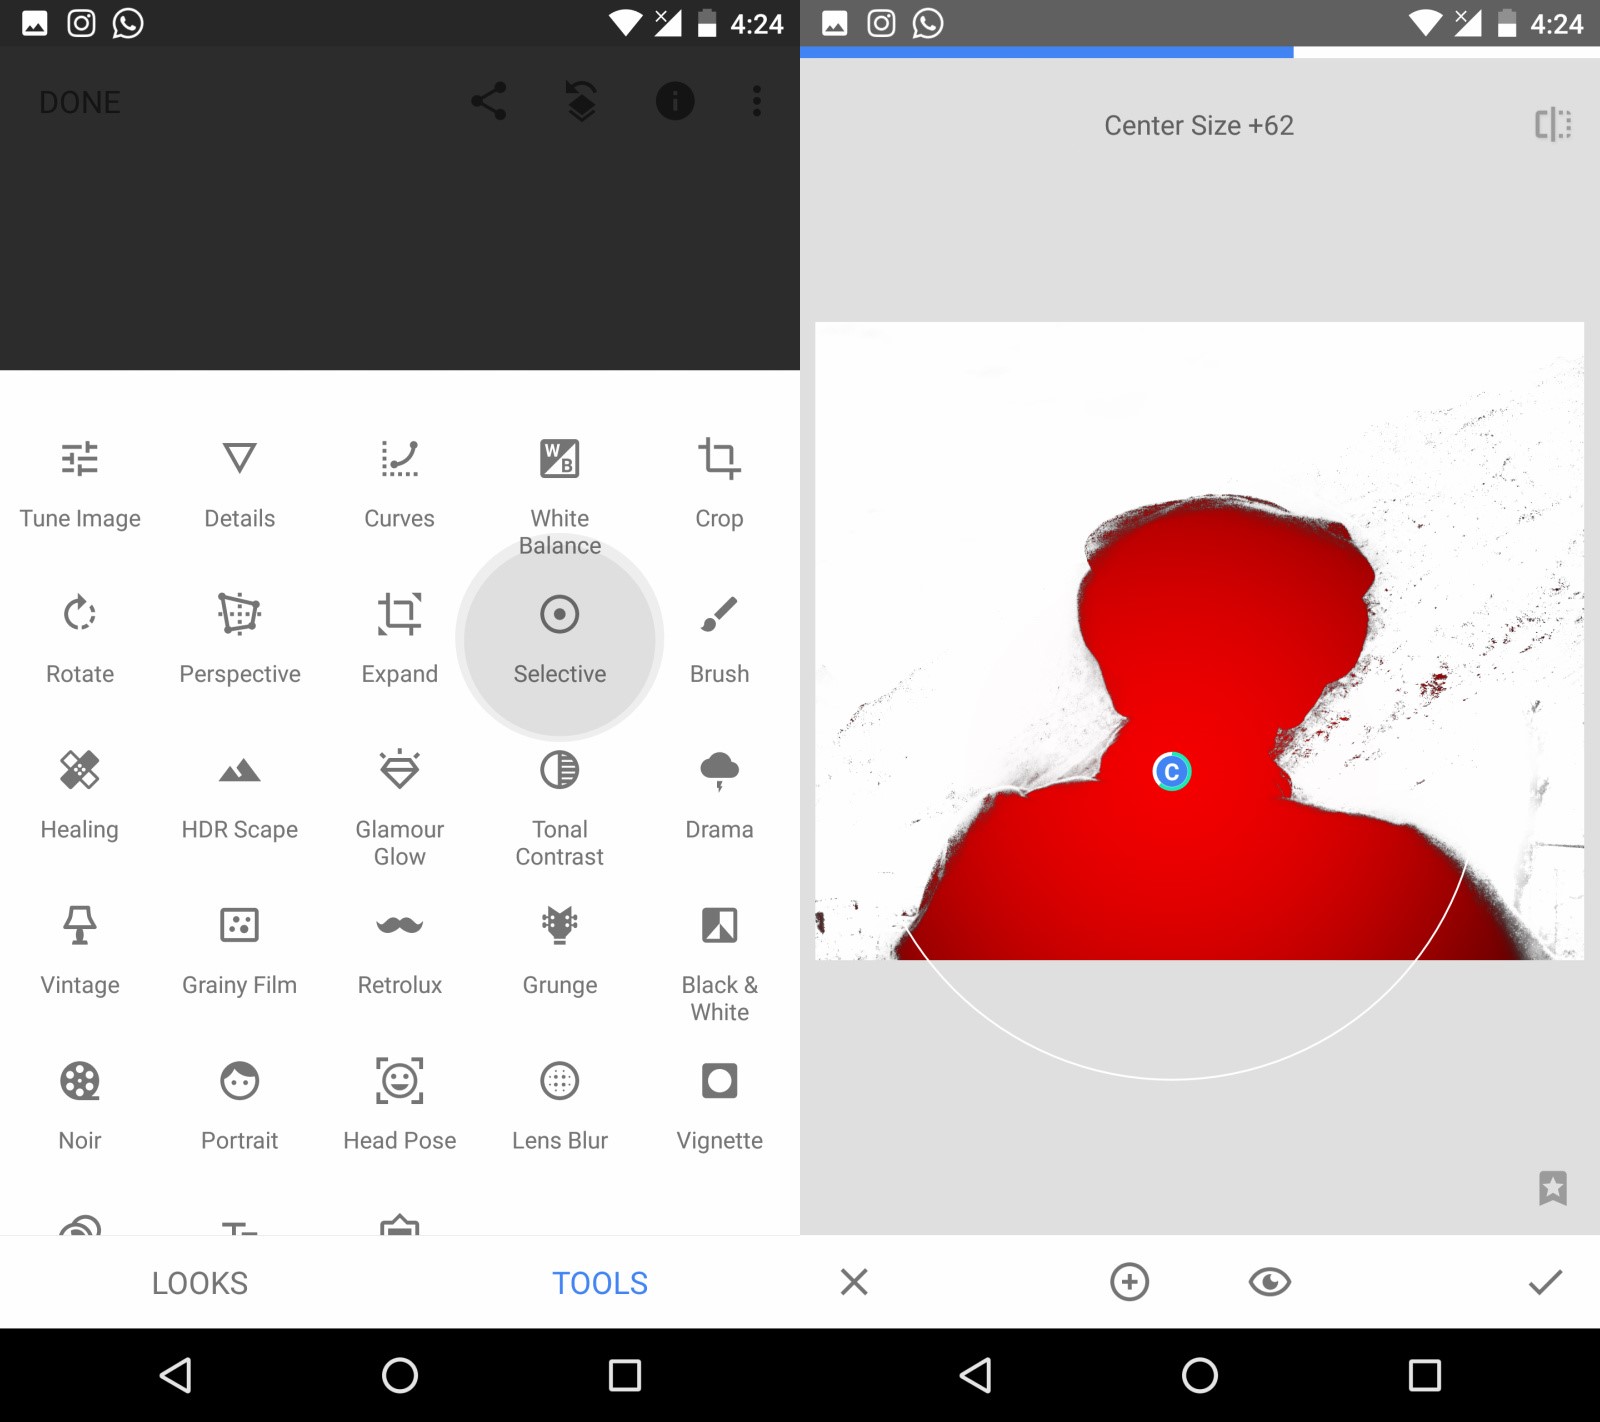
Step 8
Removed the background? Open the “Selective” tool to manually darken your object.
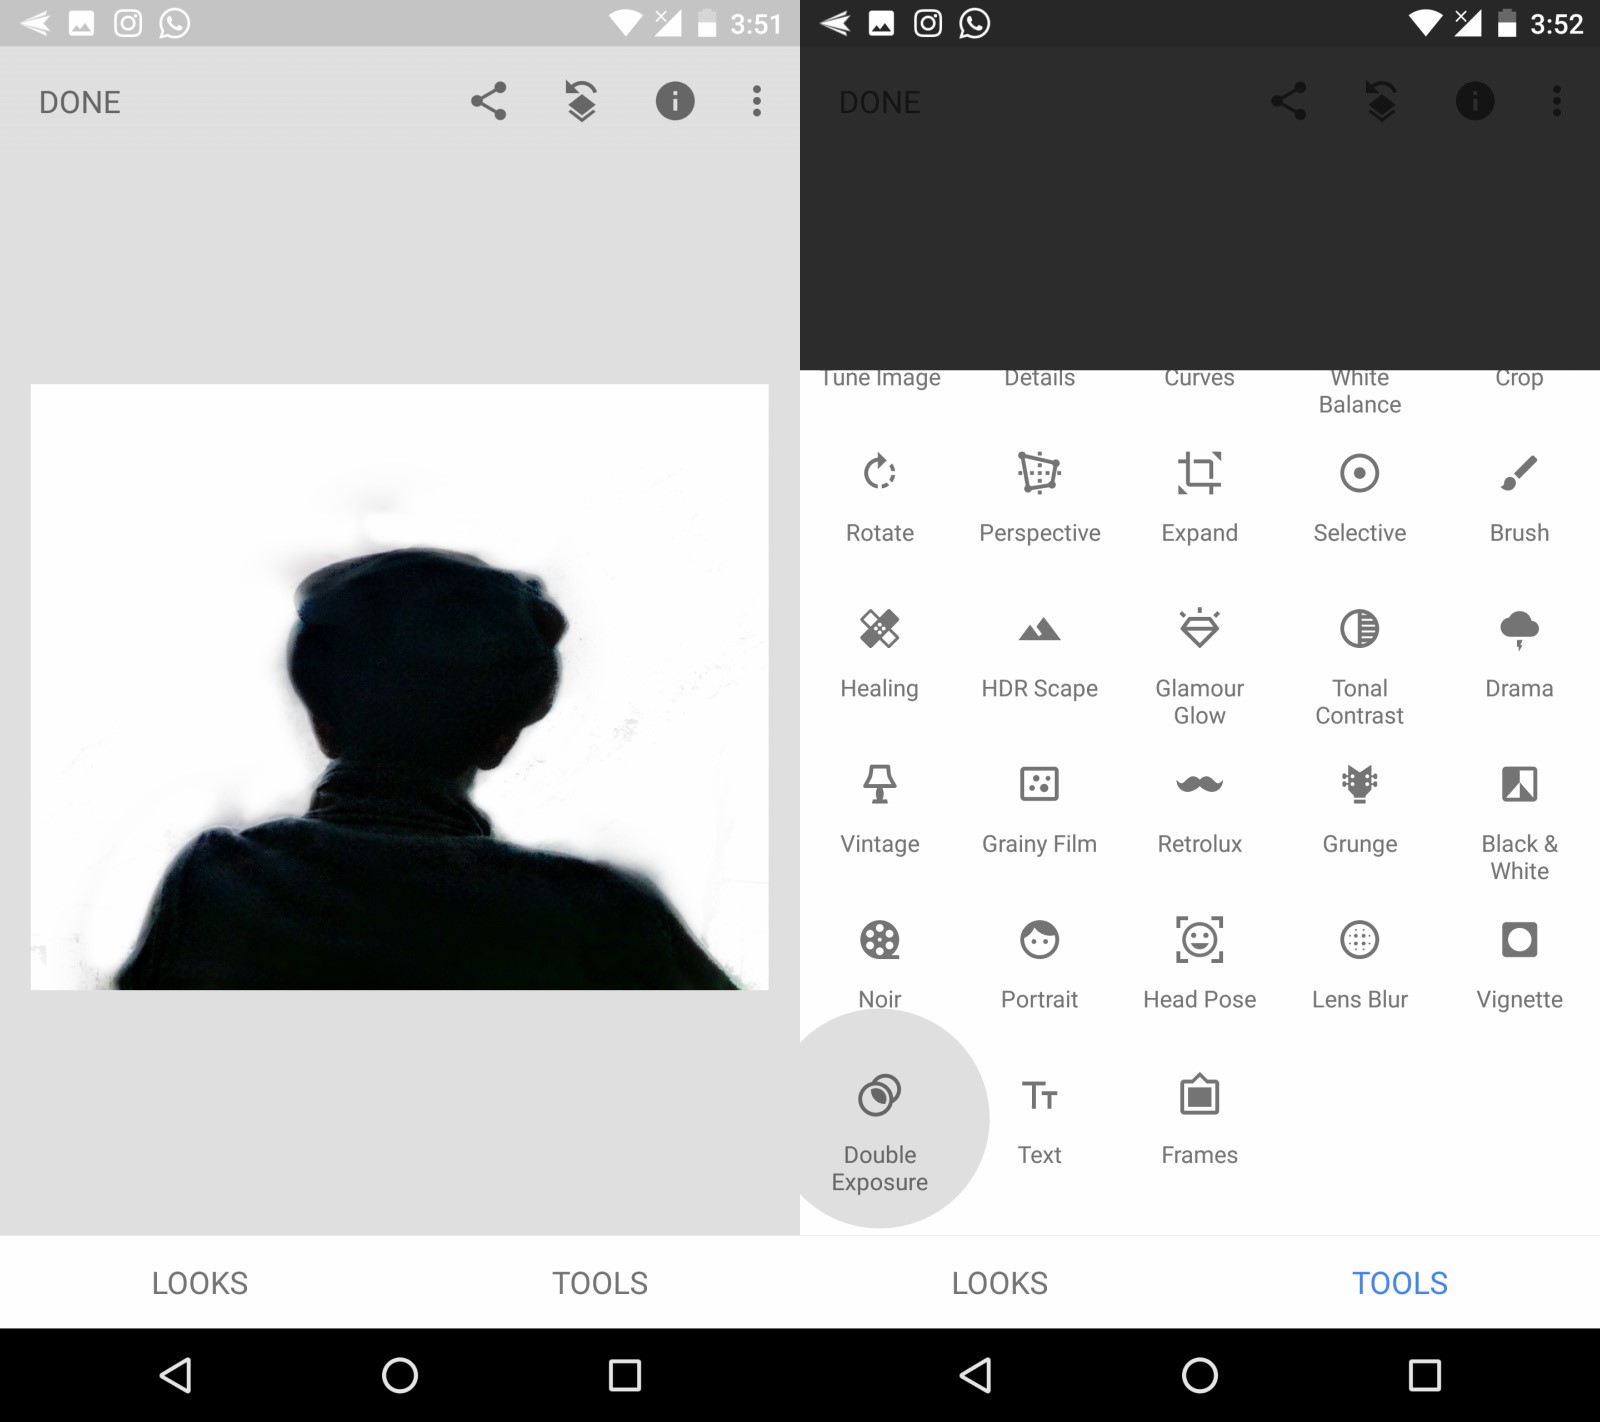
Step 9
That’s it. Your image is now ready. Now tap on “Tools” and select “Double Exposure” from the list.
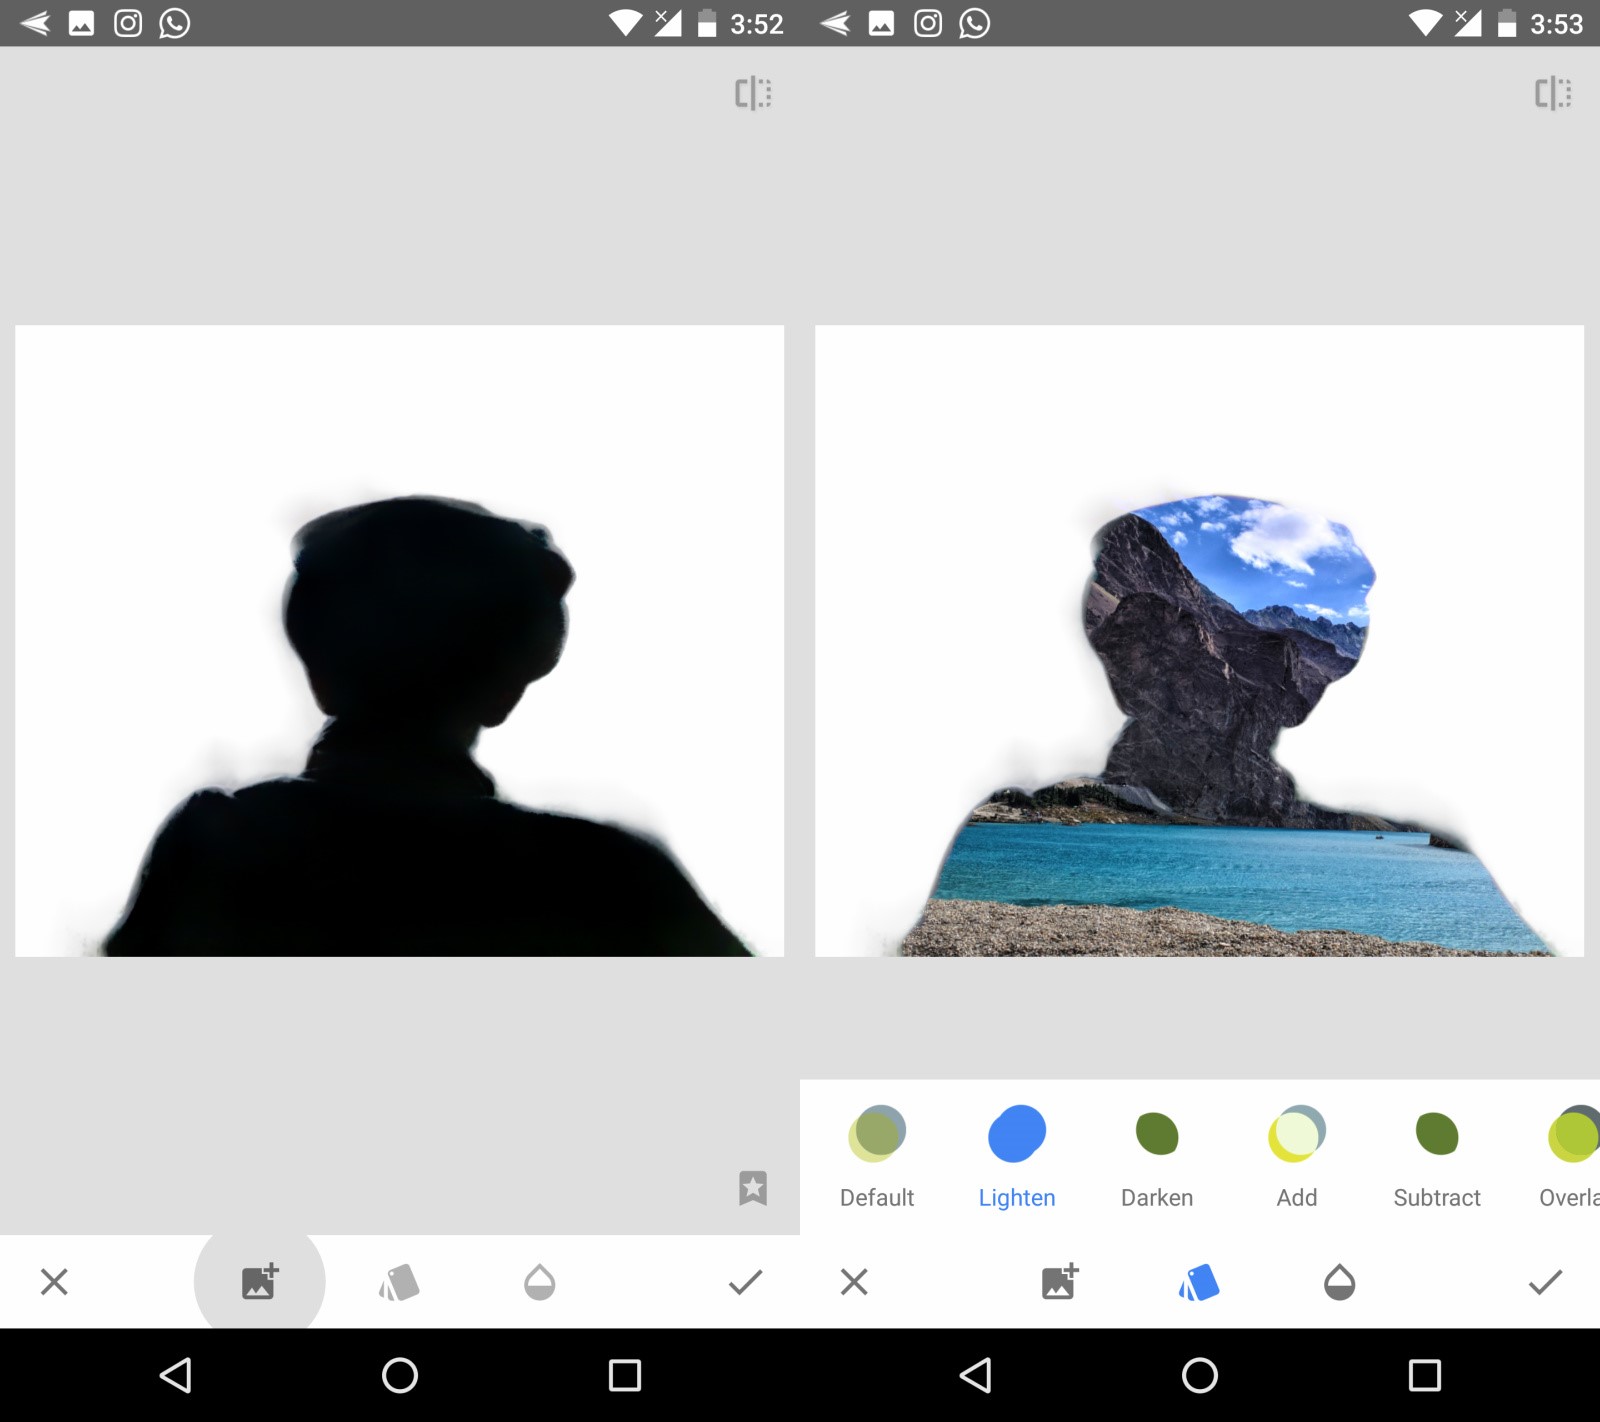
Step 10
Click on the “Add Image” icon on the bottom and select the image you want as your background. Then click on the middle icon and select “Lighten”.
That’s it. You can tweak other things like opacity by clicking on the droplet icon. You can also add more effects like Grunge, Vintage, and try out different filters using the “Curves” tool. Personally, I really like the Grunge effects, which can yield some excellent results when paired with Double Exposure shots.
Now show off the amazing pictures to your friends on Facebook, Twitter and Instagram. I am sure they would want to know how you made such beautiful images.
In case you need more inspiration, some more examples can be seen below:


Stay Connected with ProPakistani
Get the latest news, tech updates, telecom insights, and business stories wherever you prefer.
Add ProPakistani to Preferred Sources and see more of our stories in Google Search and Top Stories.


Great Apps Aj He Try KAROGA :
Finally a post of interest.. :) Thanks
wonderful post and tutorial, I would suggest to make a heading like ‘Tutorials’ under which all such articles to be placed, once again great job …
Very authentic and praticle artical,thanx.