In 2017, our phones are more powerful than even our personal computers were a decade or even a few years ago — such is the pace of technological progress. In fact, modern phones today have doubled up as digital cameras, eliminating the need for having dedicated cameras to capture special moments of our lives.
Most people today don’t even have a camera other than their smartphones. If you are one of those people, there are some incredible tools that can help you mimic DSLR-like-effects to improve the quality of your smartphone photos.
What’s even better is that you don’t even have to use a professional software like Photoshop — it can be done using any modern smartphone.
The need for dedicated cameras, like DSLRs, is still strong and will continue to be so for people who are serious about photography. Because, although the gap in quality might be less than it was, it is still significant enough to matter.
Here, we will be using the AfterFocus app. You can also use some other apps like Snapseed, to achieve this. Instagram also allows you to add a Tilt-Shift effect that mimics the DSLR-like blurring but it isn’t as good as a dedicated app like AfterFocus.
Do note that since this method uses software to implement an effect instead of a DSLR’s hardware capabilities, it won’t exactly be as good.
Download AfterFocus for Android | iPhone
Adding a DSLR-like Blur Using AfterFocus
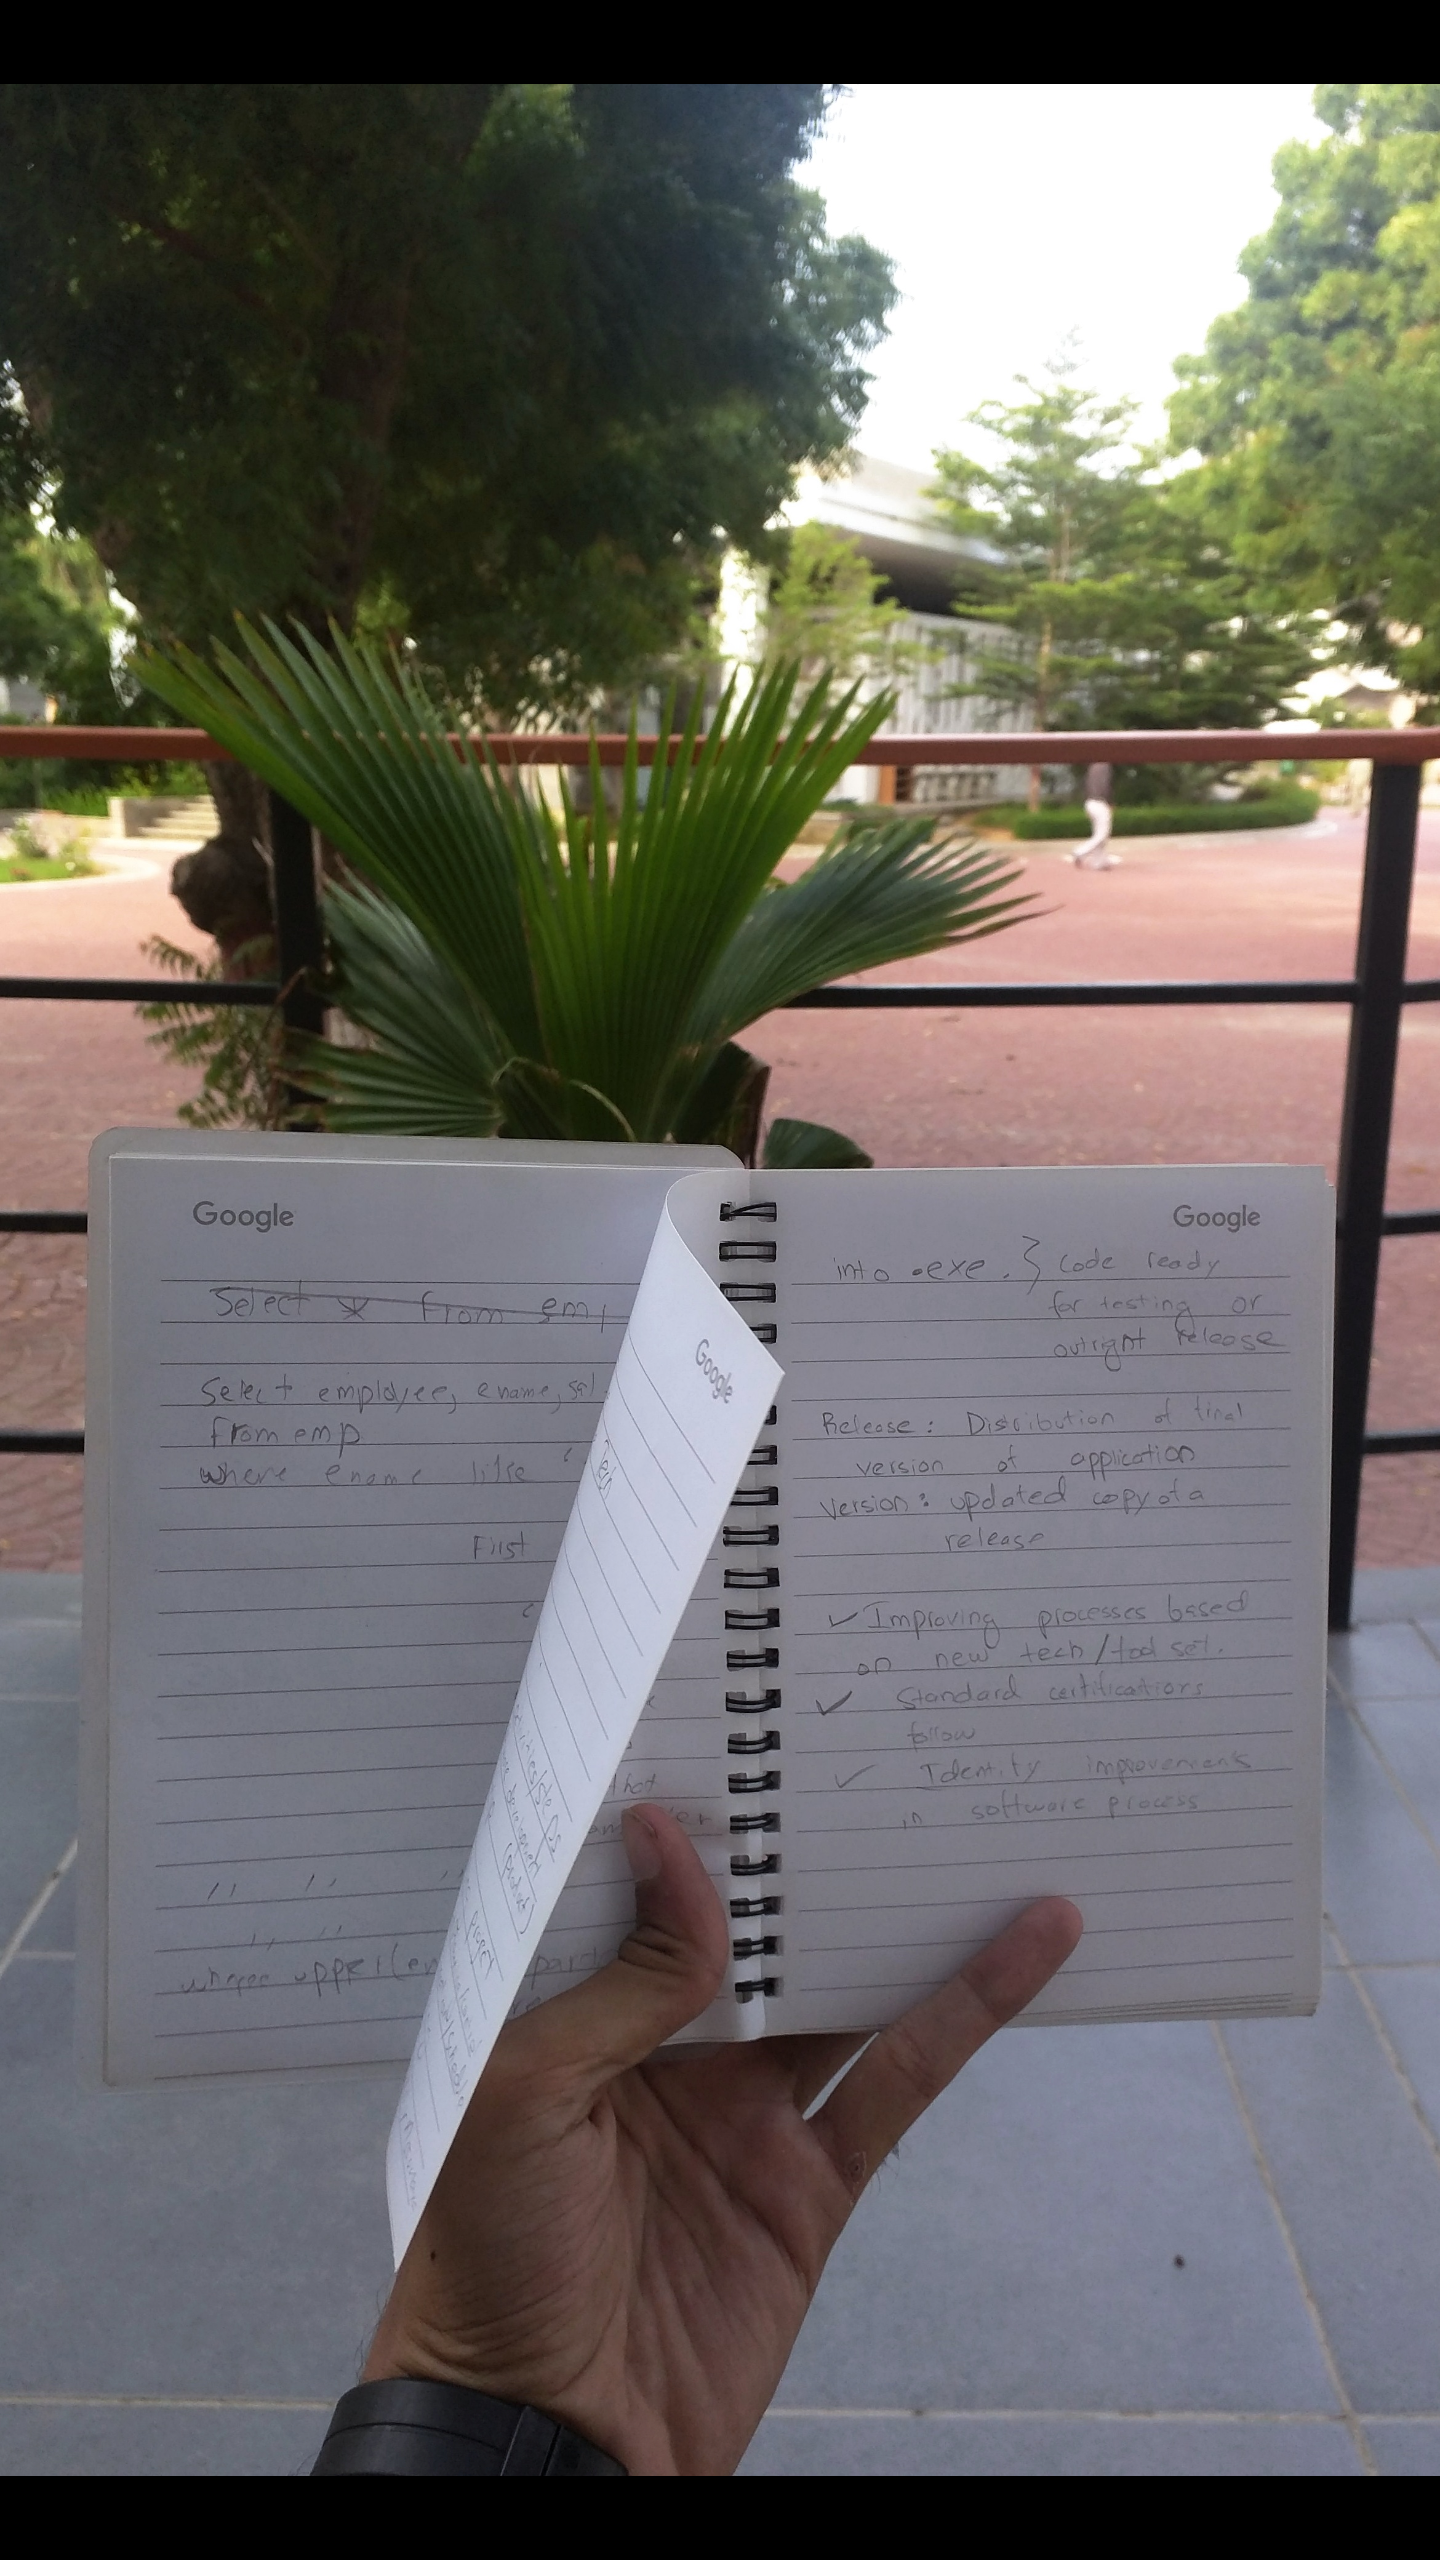
- First, download the app from the link above and select a picture that you want to edit — preferably, of an object that you want to keep in focus. Here is the picture I picked for this tutorial,

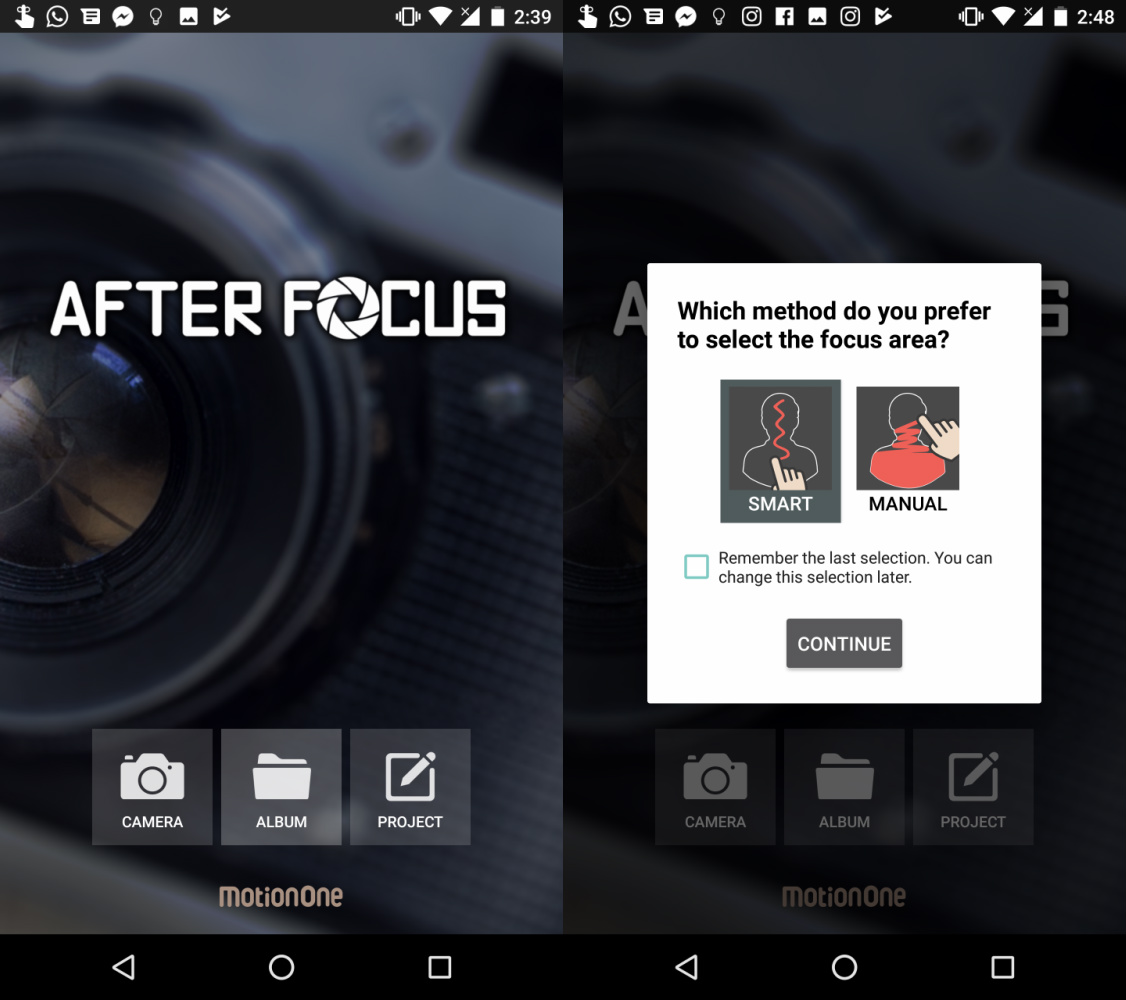
- Open AfterFocus and click on Album to select the image you want to edit. Now, tap on Smart and then Continue.
There are two modes of selection; Smart and Manual.
Smart lets you select a portion of an object and uses intelligent algorithms to figure out the rest of the object. It’s not perfect, but it saves a lot of time. On the other hand, manual gives you more control.
We will start with the Smart mode and then adjust things in Manual mode later if necessary.
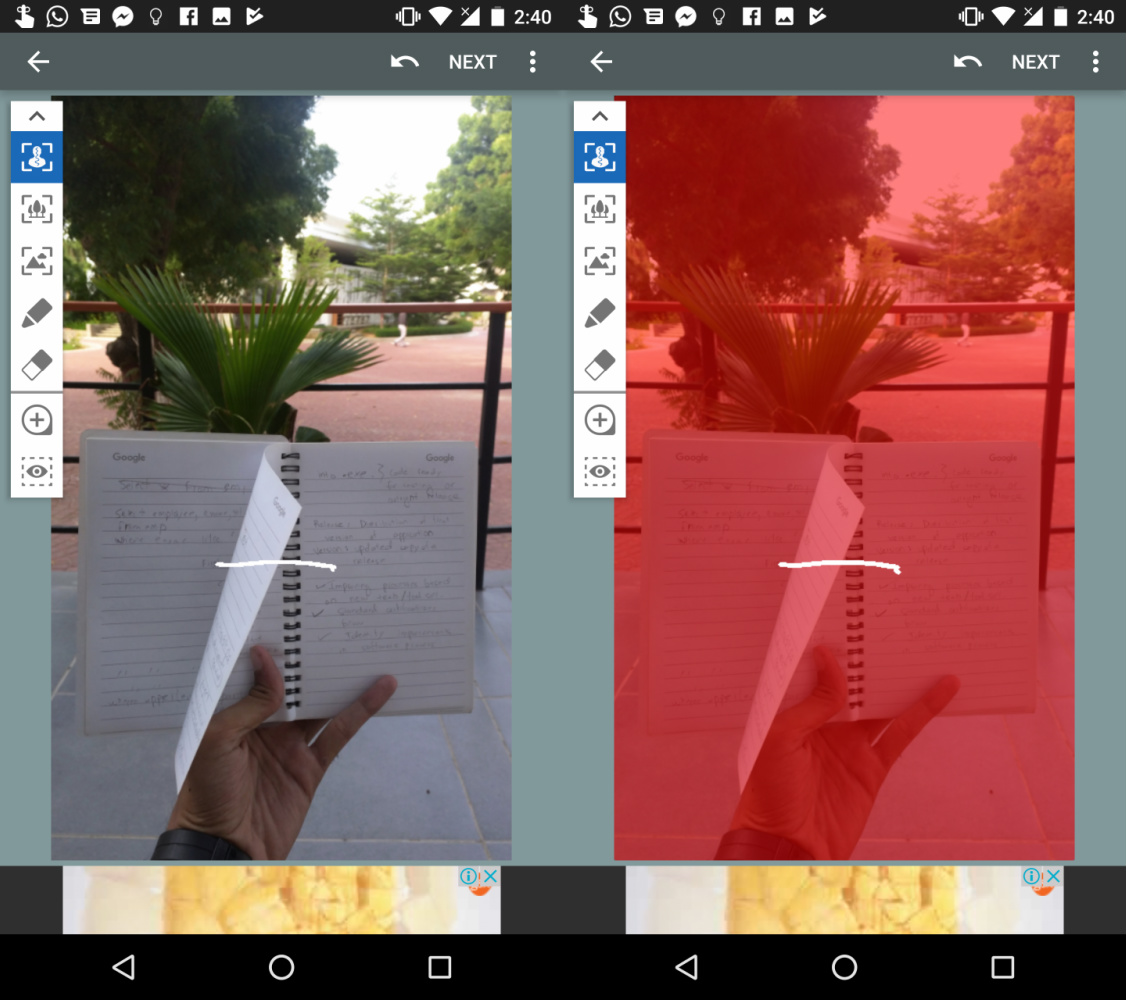
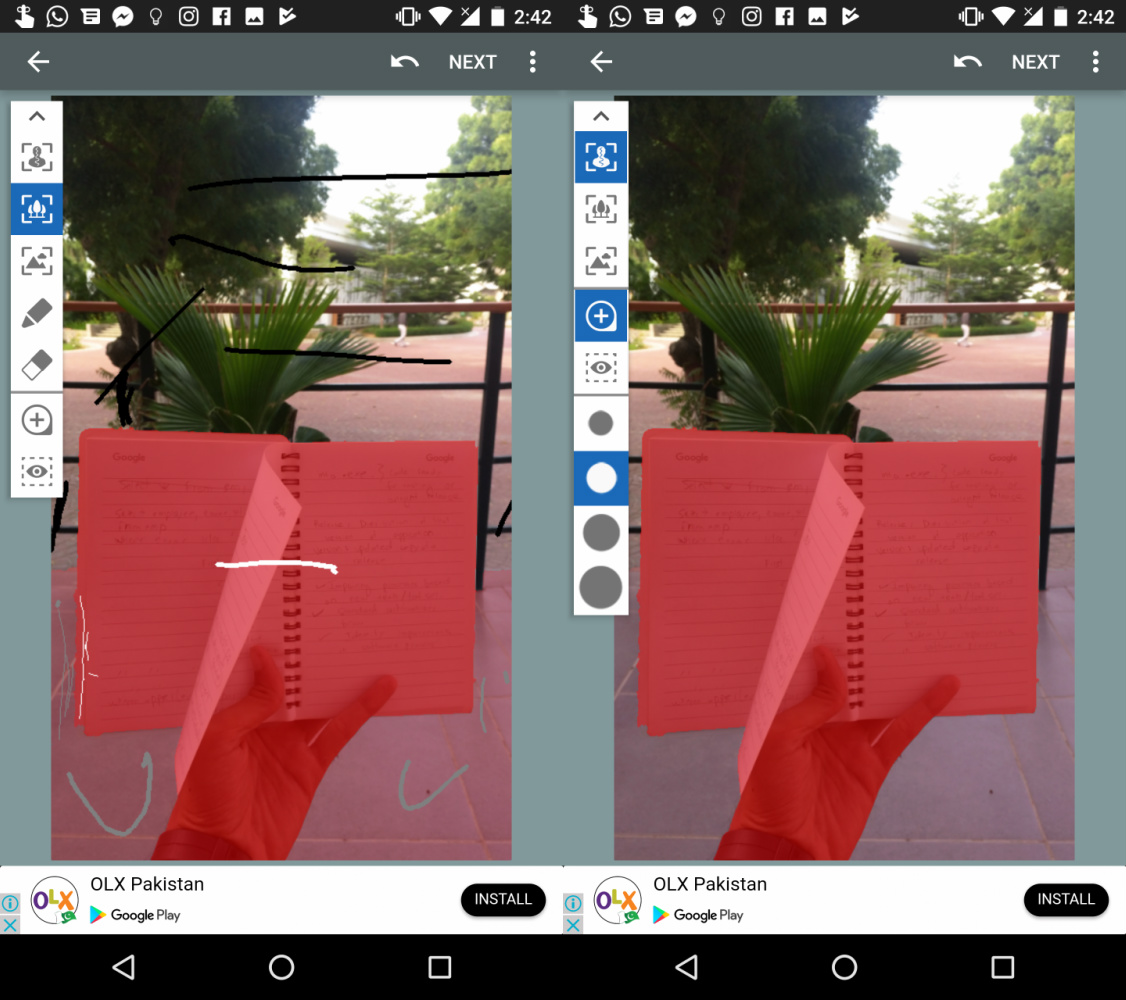
- Tap on the top-most icon on the left bar (shaped like a portrait). Now swipe over the object in your picture that you want to keep in focus. Just a small swipe would do. AfterFocus will now highlight all the selected area in red.
- In the next step, select the area of the background that you want to keep in some focus, but not all of it. This is a middle ground and it isn’t necessary to select any of it – depends on your image. In my case, I selected the floor around the notebook.
Just tap on the second icon (three trees in a frame) and swipe over the area just like you did in the first step and it will select the area in a lighter shade of red. - In this step, select the background that you want to be completely blurred. Tap on the third icon (mountains in a frame) and swipe over the background. Make sure that any area isn’t left. Keep doing this by switching modes until you are satisfied with the selected image. You can perfect this in the next step.
- You can remove any rough edges using Manual Mode. This lets you paint to select an area instead of selecting it and letting AfterFocus decided. You can open Manual mode by tapping on the Options icon (three vertical dots on the upper left) and tapping on “To Manual Mode”.Note: You can’t switch back to Smart Mode without losing your current progress.
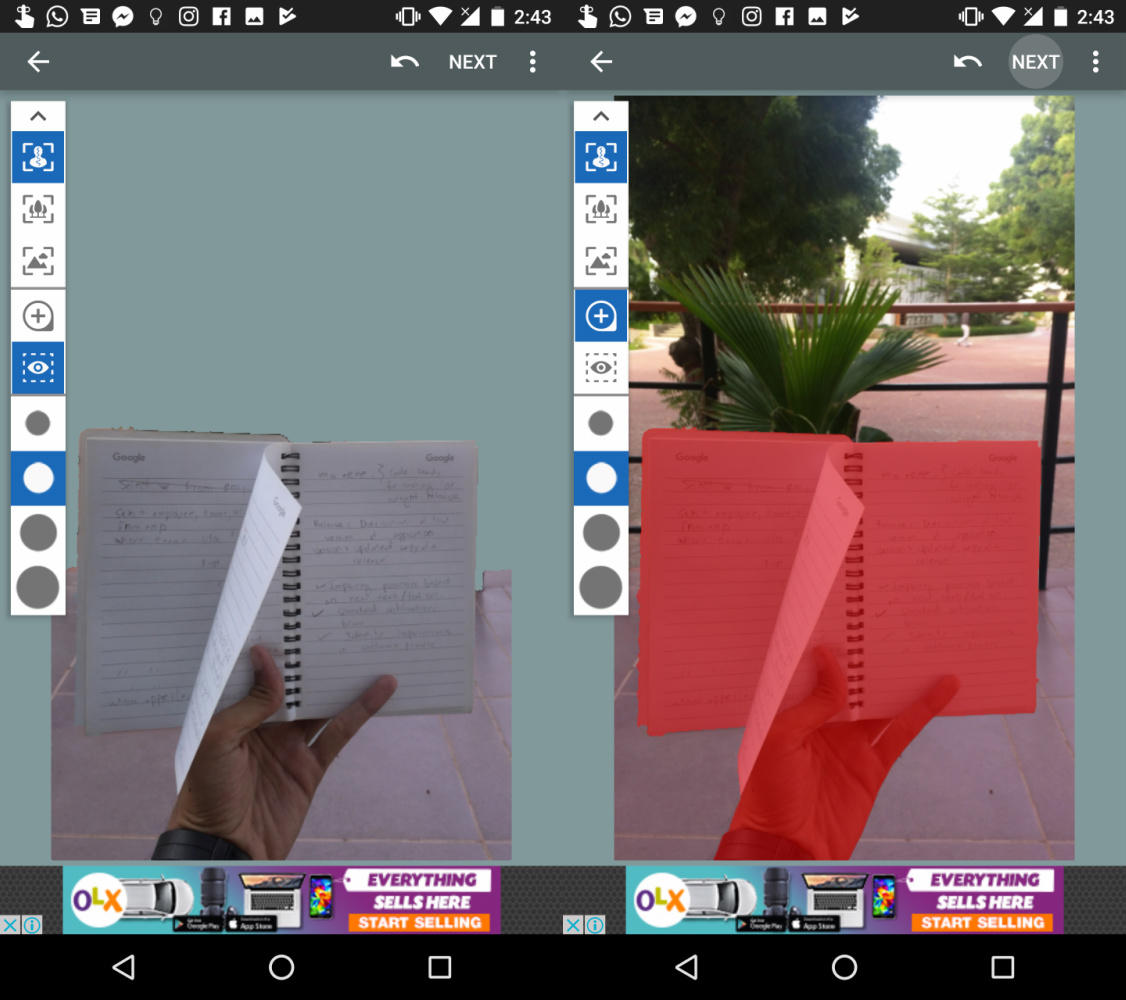
- Satisfied with the result? You can check by clicking on the eye icon on the left to see the selected area. Once you are done with this, tap on Next to move on to the next step.
- Select the kind of blur effect you want; Lens Blur is the regular blur effect you see in portraits, Motion Blur is the one used by sports photography or for fast-moving objects, Zoom Blur can also be used for the same purpose or to display action.

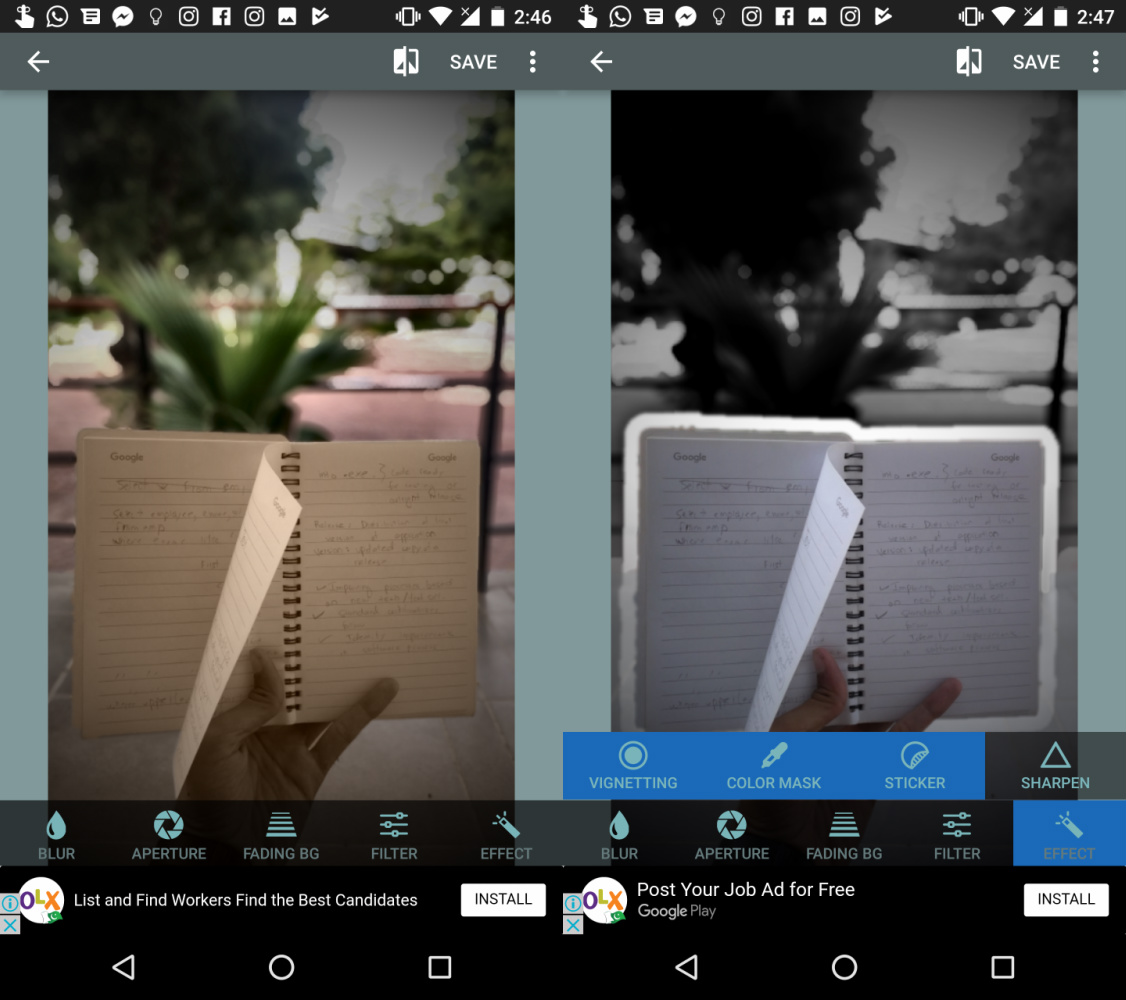
- Tap on Aperture and select Bokeh and then adjust the amount by moving the slider given below to give an effect of the bokeh lightning effect one expects from a DSLR lens. You can also adjust the fading of the background.
- You can also play around with some other fun effects in filters and effects with some interesting results.


Liked this guide? You can check out our guide on making cool double exposure effects using your phone over here.
Image— Flickr
Stay Connected with ProPakistani
Get the latest news, tech updates, telecom insights, and business stories wherever you prefer.
Add ProPakistani to Preferred Sources and see more of our stories in Google Search and Top Stories.


wahab bhai ao. waiting for ur comment
Toh phir aao.. hamko sataoo :D
lol =D
The person holding the notebook is a Web Developer :P :P
Hahah, hope to be one. Those are SQL queries on the left page…
Yep, SQL queries for employees table .. :P The most lame examples of sql, students table, employees table etc :P
True… I practically know the table by heart by now…
Good Good… :P
Installed Let me Check Agar Is tarha Kar Paya :
HAAN BHAI ZARURR…11 HOUR HO GAI