If you want to send multiple images via email or upload them on a social media platform, resizing can help a lot as it will consume less amount of time to send those pictures. Here are three ways you can resize your JPEG images.
3 Ways to Resize a JPEG
1. Resizing a JPEG Image Online
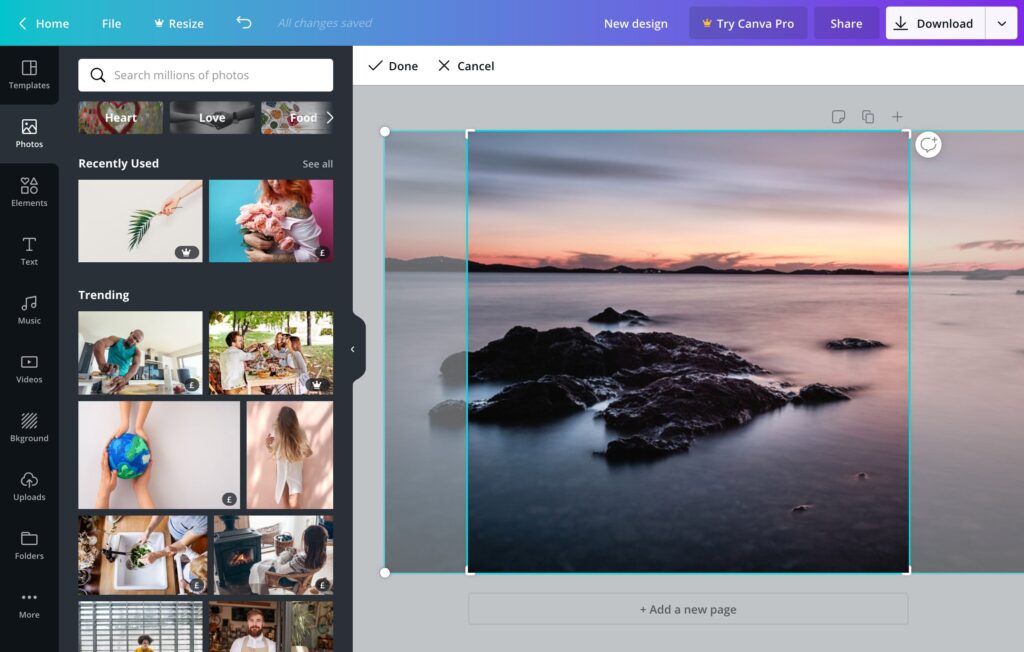
There are so many good websites online that allow you to quickly fix your JPEG images according to your desired size. Take Canva for example.
- To resize your JPEG image, go to Canva.com
- After you Sign Up using your email address, you will see a number of templates on the Home screen for different creatives.
- On the top right corner, you will see a tab ‘Create a Design’.
- Choose the option and go to Custom Size at the end of the list.
- Set a Width and Height of our image. This should be according to your preferred size.
- Click on Create New Design.
- You will be redirected to a new page with a blank template for your image.
- On the left corner, you will see an option ‘Uploads’. Click on that.
- Upload the image from your media library and choose the image you want to resize.
- Once the image is uploaded, drag and drop it to the blank size chart.
- Stretch it or fold it so that it perfectly fits in the size you provided earlier.
- Once you are done, you will see a Download option on the top right.
- Click on it and select the format for your image to be JPEG.
- Your image will start downloading and will be ready to use.
2. Resizing a JPEG Image in Windows Paint
- To resize your JPEG image in Paint, first of all, make a copy of the image so that you can keep the original one for later.
- Paint is an inbuilt free image editor in every version of Windows. To open your image in Paint, right-click on the image and go to ‘Edit’ and then ‘Open with Paint’.
- Press Ctrl+A to select the entire image that you want to resize. When your image gets selected, you will see a dotted line around its edges.
- On the Home tab, you will find the option ‘Resize’. Click on it.
- Once you open the resize option, you can either resize your image by percentage or by pixels.
- By choosing pixels, you will have to enter the exact size of the image you want it to be.
- By choosing the percentage option, you can enter percentages greater than 100 to make the image size bigger.
- To keep the image from stretching too much or folding too much, Paint keeps the aspect ratio by default.
- To define your own horizontal and vertical ratio, uncheck the ‘Maintain Aspect Ratio’ option.
- After you have changed the image size, click OK to save your changes.
- If you are not happy with the result, press Ctrl+Z to undo your changes.
- If you are happy with the new image size, go to the top left corner and select ‘Save as’ from the File option.
- Choose Save as JPEG picture.
- Give a name to your file and choose a destination for it to be saved.

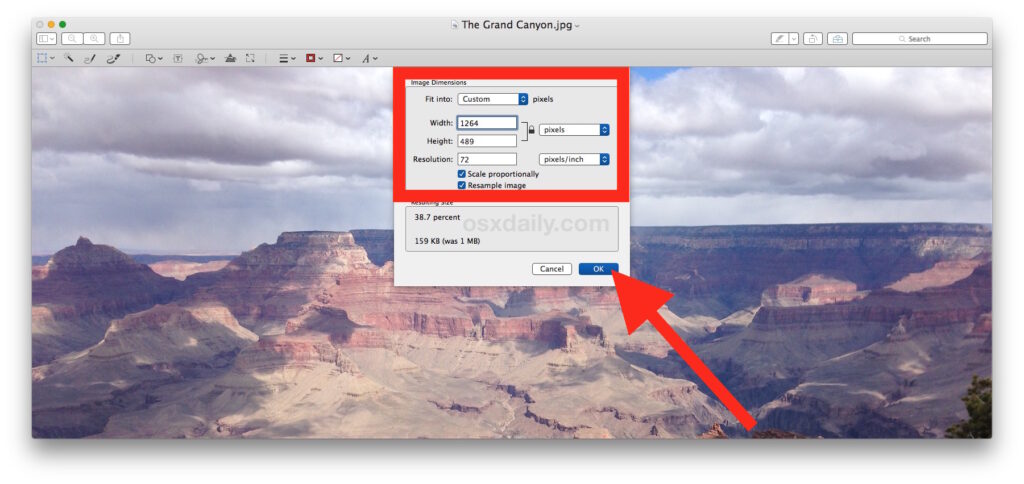
3. Resizing a JPEG Image in MacBook’s Preview
- To resize a JPEG image in MacBook, create a copy of the original file before you make any changes. Select the file and press Command+C, then press Command+V to copy and paste the image in the same location.
- Click on the image you want to make changes to and right-click the file. Go to ‘Open with Preview’ to open the file.
- Go to the Tools menu and select ‘Adjust Size’. You will be automatically directed to a new window where you can change the image size.
- Select the drop-down menu and choose from the units to make changes. You can choose to change the image size either by pixels or by percentages, similarly as in Paint.
- To resize both vertically and horizontally without maintaining the aspect ratio, uncheck the ‘Scale proportionally’ box.
- Click OK to save the changes on your image. If you don’t get the desired results, press Command+Z to go back to the original size.
- To save your file, click on the File menu and select ‘Save’ to save your new JPEG image.
Always remember that changing an image’s size can reduce the quality slightly and stretching an image can make the pixels look blocky and grainy.