Whether it’s cracked or has one too many blown pixels, a broken display can stop you dead in your tracks. But with the right tools, a little technical know-how, and a bit of patience you can replace a damaged LCD. This article is all about how to replace a broken laptop screen. Let’s find out!
Also read: Checking PC For Bugs And Viruses In Pakistan
Should you try this fix?
If accidental damage is covered under your laptop’s warranty, don’t do this fix yourself. Get the laptop repaired under seller’s warranty.
We also suggest you check CNET’s what to know before trying to fix a smartphone or tablet. It’s not specifically about laptops, but the information is still relevant, and it will help you decide if you should repair the machine yourself or take it to a shop.
First Things First | Replacement Laptop Screen
Finding a replacement LCD is typically easy—and you don’t have to pay the crazy prices that the manufacturers usually charge.
You’ll find that most regular screens can be had for as low as Rs 2500 to Rs 6500. If you can’t find what you’re looking for, try other identification numbers from the laptop label or documentation. Some vendors have one or two different sets of identification numbers that could serve as your model number.
Finding replacements for typical laptop components isn’t a dismal affair in Pakistan. Usually, all computer parts are easily found at your nearest computer shop. The only concerning thing in all this is how much money you are willing to spend on a screen.
Tools | How To Replace A Broken Laptop Screen
Before starting, ensure you have the proper tools. Here’s what works for most laptops:
- Table or other flat working area: You’ll need a spot to sit (if that’s your thing) with a flat area to work on your laptop. This gives you a reason to clean off that messy dining-room table or desk.

- Small-head magnetic Philips screwdriver: Not small like a mini screwdriver from an eyeglass repair kit, but we’d say between that size and a mid-sized screwdriver would work. If you don’t have a magnetic-head screwdriver, try to find a magnet big enough to magnetize the driver head.

- Safety pin or needle: This is for removing the cover stickers that are hiding the screws on your laptop’s surrounding cover, called the bezel.

- Plastic putty knife or other thin object: This is optional, to aid in prying apart the screen bezel from the case.
- Small bowl or other container: This is for stashing the small screws—and keeping them safe from curious cats and children.
Let’s Get To Work! | How To Replace A Broken Laptop Screen
These general steps work for most laptops:
- Ensure the laptop is unplugged from the AC adapter. Remove the laptop battery as well.
- Find the round cover stickers that are hiding the screws on the screen bezel, the case surrounding the screen. These stickers are usually on the bottom of the bezel, near the screen hinges, when you have the screen opened. You should find one on each side of the screen. Refer to adjacent black dots in the following image:

- Use a sharp, pointy object—like an opened safety pin or needle—to help remove the cover stickers without damaging them. Stick it between the edge of the cover and bezel, and then pry the sticker away.
- Use your screwdriver to remove the now-exposed screws. Remember: righty-tighty, lefty-loosey. Some screws are easy to remove; others, not so much. But moving the screen into just the right position usually exposes the screws enough for removal.
- Carefully start prying the screen bezel away from the back side of the screen case. Work a fingernail or other thin, prying object into the crack around the outside of the screen.

- Once you’ve unsnapped the screen bezel, it may or may not be easy to remove. If not, it’s likely stuck around the screen hinges. Moving the screen position up or down, with some gentle force if necessary, should free it fully.
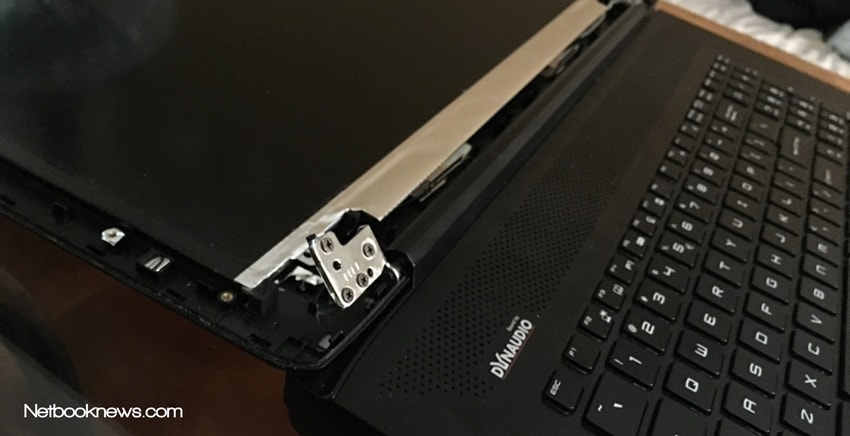
- Once the bezel is fully removed, you’ll find the LCD secured to a metal trim frame on the left and right sides. Remove the two screws (one on each side, on the top) holding the trim frame pieces to the back-screen case. Now, you should be able to lift the LCD with ease!
Removal | Reversal | Know What You’re Doing
- On each of the trim frames’ sides, remove any screws that are securing it to the LCD. Most laptops have three screws on each side.

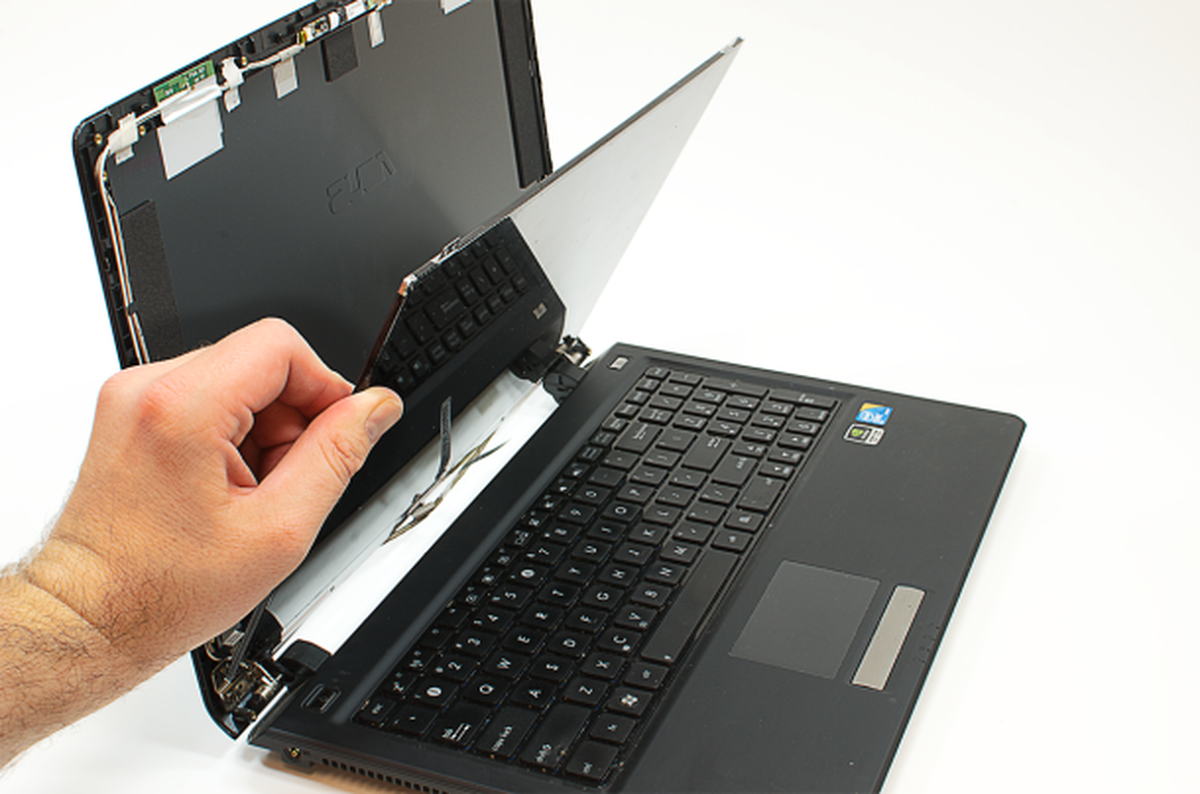
- Now you should be able to set the LCD face-down onto the keyboard. Be careful not to put excessive force on the video cable attached to the back of the LCD.

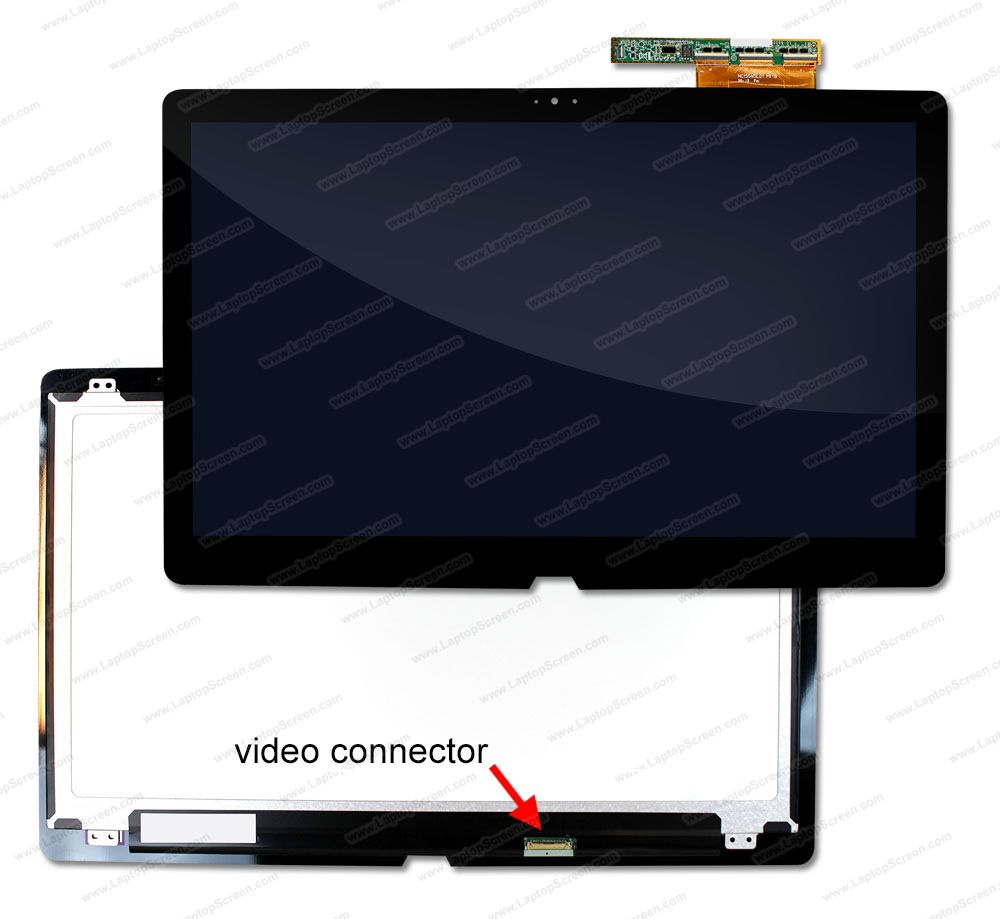
- Disconnect the video cable from the back of the LCD. Generally, most laptops have these connectors in the center of the connector-tray.
You usually have to remove the tape that’s securing the video connector at the back of the screen as well. When you get to the point of actually pulling the video cable out of the screen connector, it should unplug with little force.

Re-Connection | Putting The Puzzle Back Together

- Once you’ve fully removed the broken LCD, simply place the new one face-down like you did the old one. Re-connect the video cable in the same way you detached it.
- Set the new screen up in the side trim frame pieces, then re-secure it like the old one was.
- When you get to the point of putting the bezel back on, just line it up and push/squeeze the bezel back into the snaps of the rear screen case.
- Before replacing the bezel screws, ensure the bezel is fully snapped in place and no crack exists around the edges of the screen case.
- Lastly, use that safely pin or needle to reattach the sticky screw covers.

Well, there you have it guys! This was all about how to replace a broken laptop screen. If you have any questions, just drop a comment in the section provided below.
Cheers!