
Over the years, Facebook has suffered several security breaches, including the infamous Cambridge Analytica scandal in 2018. Facebook has also been under fire for several incidents including data leaks, private conversations made public, privacy breaches, and much more.
Although, it is true that any online platform with information regarding its consumers can be easily breached, however, luckily enough Facebook provides its users with numerous options that can help minimize privacy breaches.
This guide goes through 15 ways you can protect your privacy on Facebook.
1. Control Who You Share Content With
a. Limit Privacy for Past and Future Posts
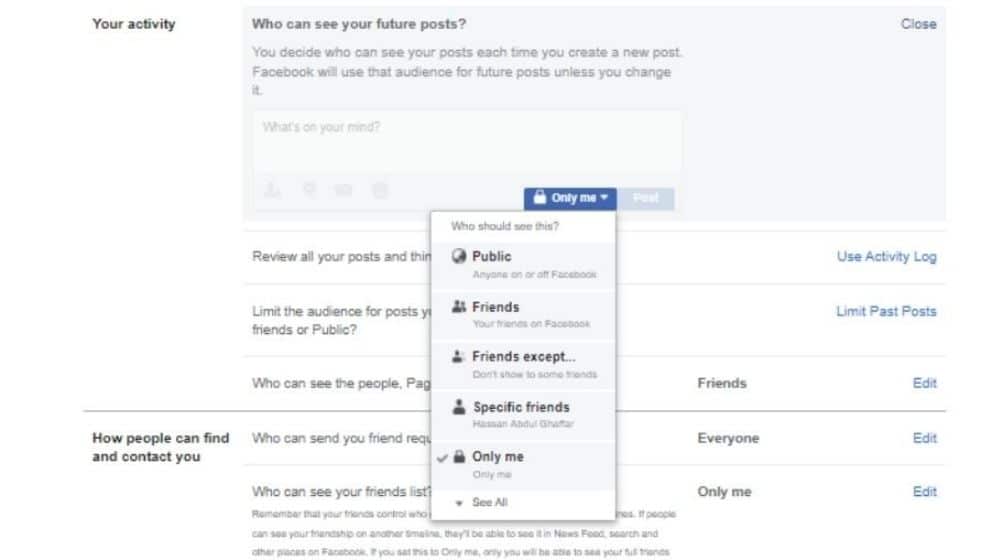
Facebook allows users to control who can see any of their future or existing posts. In 2014, the social network changed its default timeline post settings from ‘public’ to ‘friends.’ Users can easily change these settings for their posts and photos. They can be edited by accessing Settings and Privacy -> Settings -> Privacy.
In the Your Activity section, when a user clicks on Edit, they are provided with several options:
- Public – Selecting this option allows everyone on the internet, even those without a Facebook account to view your posts.
- Friends – Only people added as your friend on Facebook can view your posts.
- Friends except – This allows you to eliminate viewers from viewing your posts.
- Only Me – Only you will be allowed to view your posts and no one else.
- Specific Friends – Only friends you select will be able to view your posts.
Facebook also grants users the option to limit the audience for old posts on their timelines. In the same Your Activity section, under Limit the Audience for Old Posts on Your Timeline, Facebook allows users to limit their past posts and change the privacy of anything shared with Friends of Friends or publicly. The settings for all posts are then changed to only your friends.
b. Profile Locking
Recently, Facebook added a feature that allows users to lock their profiles. Locking a profile allows people who are not your friends to have a limited view of your content.
If a Facebook profile is locked, only friends can see the photos and posts on your timeline, access your full-size profile picture and cover photo, all posts posted publicly will change to Friends, and only a portion of the About Info will be visible to everyone.
Profile review and tag review will be turned on, and any new posts shared will only be visible to your friends. To turn on profile locking:
- Click on the “…” drop-down menu.
- Click Lock Profile.
- Click on Lock Your Profile.
- Click OK to return to the previous page.
- When you or anyone views your profile after locking it, a blue badge will appear on your profile stating that your profile has been locked.
2. Revoke Permissions for Apps and Games
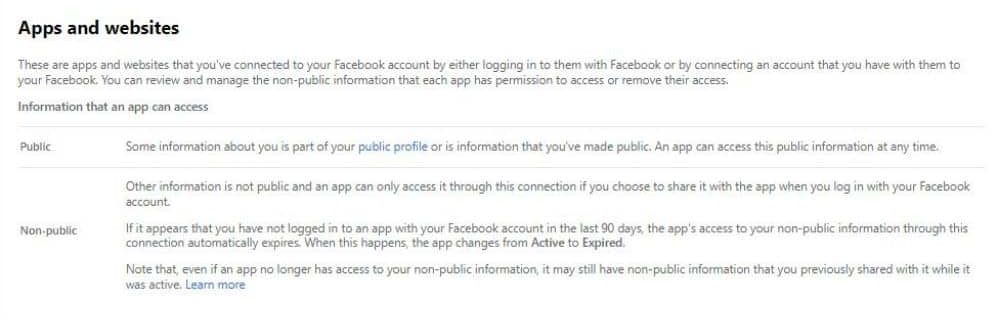
People all across the world have signed up for numerous games using their Facebook accounts. If you’ve played Farmville or any other similar game that asks you to grant access to your Facebook account, chances are the game still has access to your data. Similarly, any other applications or websites you have connected to your Facebook account by either logging into them or by connecting an account that you have with them on Facebook can also have access to your data.
To remove permissions for apps and games:
- Go to Settings and Privacy.
- Select Settings.
- Go to Apps and Websites or Games.
- A list of applications and websites or games appears that give the user two options: either View & Edit the application or completely remove it.
- If you click on the View & Edit option, all details that are shared with the website or app such as profile picture, name, avatar, player name, friends list, preferred language, email address, etc. can be viewed. The date on which the app or website was added is also displayed.
The user can also choose the audience for posts made by the application between Public, Friends, Only Me, and Custom. You can also remove access to permissions granted and all connections between Facebook and the app or website by clicking on the Remove button.
- Once an application is removed, the app or website can no longer access any non-public information. However, the app or website may still be able to access any information or data it may have received before its removal.
- Make sure to check the Delete Posts, Videos, or Events posted on Your Timeline and to check the Allow Facebook to notify [App] that your login connection has been removed.
- Click Remove.
3. Limit Who Can Find You on Facebook
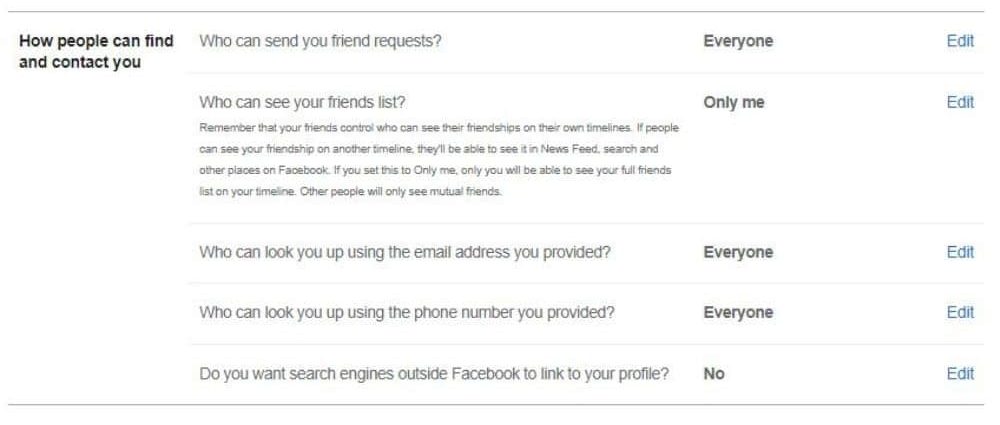
To avoid getting unnecessary friend requests from strangers, you can limit who you get friend requests from:
- Go to Privacy.
- Go to the How People Can Find and Contact You section, click on Who Can Send you Friend Requests?
- Users can select between two options: Everyone or Friends of Friends.
To change who gets to search for you via the email address you have provided:
- Go to Privacy.
- Go to ‘Who can look you up using the email address you provided?’
- Users can select between the options: Everyone, Friends of Friends, Friends, and Only me.
To change who gets to search for you via the phone number you have provided:
- Go to Privacy.
- Go to ‘Who can look you up using the phone number you provided?’
- Users can select between two options: Everyone, Friends of Friends, Friends, and Only me.
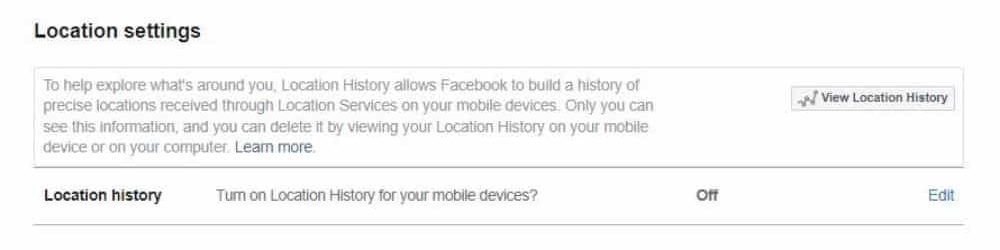
4. Turn Off Location Services
Location Services let Facebook provide users with live location-based information. The company claims that it uses location information to help users explore places and areas around them, improve account security, and show better ads.
However, if you would like to change how Facebook accesses your location on the web, you can simply:
- Go to Settings & Privacy
- Click on Settings.
- Click on Location.
- In the Location History, you can toggle the ‘Turn on Location History for your mobile devices?’ by selecting the On or Off option from the drop-down menu.
For the Facebook apps on Android and iOS:
- Go to Settings & Privacy.
- Click on Settings.
- Under Permissions, click on Location.
- Edit the location option as you wish.
Even if a user turns off their location, Facebook can still estimate the location of a user using information such as the user’s IP address, etc.
5. Remove your Facebook Profile from Appearing in Search Engine Results
Facebook has several features that can help make the online footprint of a user less obvious. One such way is to remove your Facebook profile from appearing in Google search results, using the following:
- Go To Settings & Privacy.
- Click on Settings.
- Click on Privacy.
- Under ‘How people can find and contact you’, look for ‘Do you want search engines outside Facebook to link to your profile?’
- Click on Edit and make your selection.
6. Review Profile and Tagging Settings
Facebook allows you control over who can tag you in posts such that you get to approve any post you have been tagged in before the post appears on your timeline. To change tagging settings:
- Go to Settings & Privacy.
- Click on Settings.
- Click on Profile & Tagging.
- Under Profile, users can change ‘Who can Post on Your Profile?’ and ‘Who can see what others post on your profile?’ Users also have the choice to select between ‘Friends’ and ‘Only Me’.
- Users can also add keywords in the Hide Comments Containing Certain Words from Your Profile.
- Under Tagging, users can change ‘Who can see posts that you’re tagged in on your profile?’ and ‘When you’re tagged in a post, who do you want to add to the audience of the post if they can’t already see it?’ Users can select from the options: Everyone, Friends of Friends, Friends except, Specific friends, Only Me, Custom.
- Under the Reviewing section, you can toggle options for ‘Review posts that you’re tagged in before the post appears on your profile’ and ‘Review tags that people add to your posts before the tags appear on Facebook.’
7. Restrict or Block a Specific User
With social media, it becomes very easy for users to come across someone they do not wish to be connected with. Facebook grants you the options to block specific users:
- Go to Settings & Privacy.
- Click on Settings.
- Click on Blocking.
- Under the Restricted List section, you can add a friend to the list if you want them to stay friends but do not want them to view any of your posts. However, the other user can still view any posts you share with the Public or on a mutual friend’s timeline.
- Under the Blocking section, you can block a user by simply typing their name into the given space.
- Under the Blocking Messages section, added users will not be able to contact you in Messenger, send you messages, or call you.
- Other blocking options provided by Facebook include blocking accounts blocked by a user’s Accounts Centre, block account invites, block app invites, block event invitations, block apps, and block pages.
8. Review and Update Privacy Settings for Your Profile
Until a user customizes their About column, Facebook profile privacy settings are automatically set to public. Users can change their profile privacy settings by following these steps:
- Open your Facebook Profile by clicking on your name at the top left of the Facebook homepage.
- Under the Intro section on the left side of the screen, click on Edit Details.
- Unselect any personal information you do not wish to be publicly visible by toggling the grey bars at the left of each item.
- Click on Save to update your preferences.
- You can also open your About section from the left of your timeline and select the category you wish to change the settings of.
- Users can choose their audience for each item by using the small grey privacy icon.
9. Update News Feed Preferences
To adjust News Feed preferences, follow these steps:
- Go to Settings & Privacy.
- Go to News Feed preferences.
- Tap on any of the following options to adjust your News Feed preferences:
- Manage Favourites: This option lets you add people and pages to prioritize their posts in the News Feed.
- Unfollow: Unfollow people, pages, and groups to hide their posts.
- Reconnect: Access and reconnect with people, pages, or groups you may have unfollowed.
- Snooze: Manage people, pages, or groups you may have snoozed.
- Reaction preferences: Control whether the total number of reactions is visible on Facebook posts.
10. Customize Ad Preferences
Facebook targets its users with ads based on their activity on the platform. It is also known to track users across websites, online retailers, and pretty much all across the web. To control Facebook from using your data to show personalized ads:
- Go to Settings & Privacy.
- Go to Settings.
- Click on Ads in the left menu.
- In the list of advertisers you’ve seen most recently, you can select the brands whose ads you do not want to see.
- In the left panel, Navigate to Ad Settings.
- Under ‘Manage data used to show you Ads,’ click on ‘Data about your activity from partners.’
- Navigate to ‘Choose where we can use data from our partners to show you personalized ads’ and toggle the switches for the websites you do not want to share your data with Facebook.
11. Access, Manage and Download your Facebook Information
Facebook allows its users to access any information they have shared online and manage it. Moreover, users can also download their information for review by following these steps:
- Go to Settings & Privacy.
- Go to Settings.
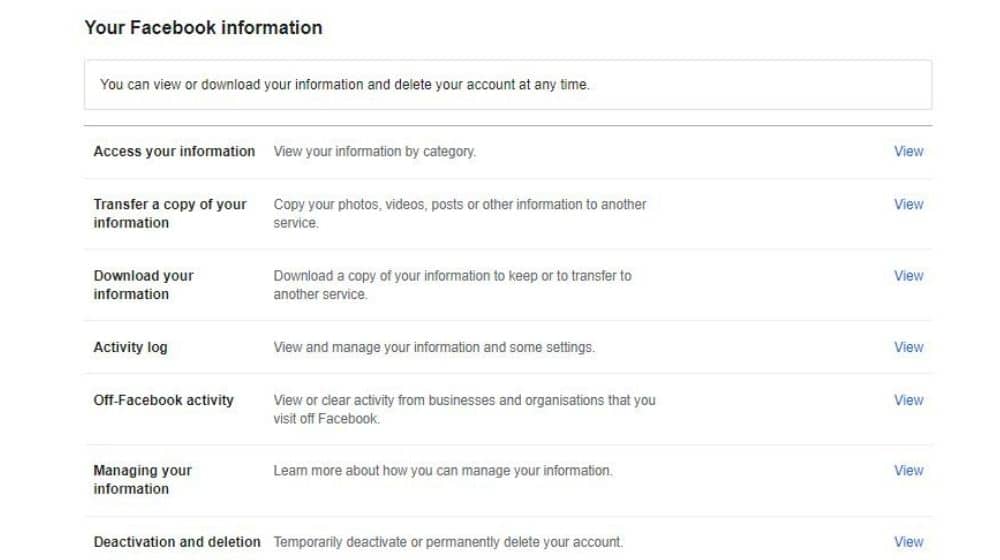
- Click on Your Facebook Information.
- The settings allow you to Access your Information, transfer a copy of your information, Download your Information, Activity Log, Off-Facebook Activity, Managing your Information, or Deactivation and Deletion of your Account.
- In Access your Information, clicking on View sends you to a new page showing all your Recent Activity including all your recent activity on the site, personal information, friends and followers, logged information, security and login information, apps and websites off Facebook, Preferences, and Advertisement information.
- In Transfer a Copy of your Information, clicking on View allows the user to transfer a copy of the information the user has created or shared on Facebook to another service. Users can also choose to download their information or access it.
- In Download your Information, the user can download their information to keep or transfer to another service.
- In the Activity log, the user can view and manage your information and some settings.
- In Off-Facebook Activity, the users can view or clear activity from other businesses or organizations that they visit off of Facebook.
- In Managing your Information, users can learn more about how to manage their information.
- In Deactivation and Deletion, users can either temporarily deactivate or permanently delete their accounts.
12. Manage Content You Share on Facebook
You can manage the content shared on Facebook such as posts, photos, and videos from the Manage Activity section. To access the section:
- Open your profile.
- Click on ‘…’ and navigate to the Activity Log.
- Under Activity Log, you can Access your Post, Activity You’re Tagged In, Interactions, access Groups, Communities, and Events, Profile Information, Connection, as well as Logged Actions and other Activities.
- Users can also access their archived posts and stories, in addition to posts, comments, and stories that have been deleted along with Timeline, photo, and tag reviews.
13. Enable Two-Factor Authorization (2FA)
Two-factor authentication is a feature that can help protect a Facebook account in addition to your password. After setting up two-factor authentication, the user will be asked to enter a special login code or confirm any login attempts every time a new device tries to access your Facebook account.
To turn on two-factor authentication:
-
- Go to Settings & Privacy.
- Go to Settings.
- Go to Security and Login Settings.
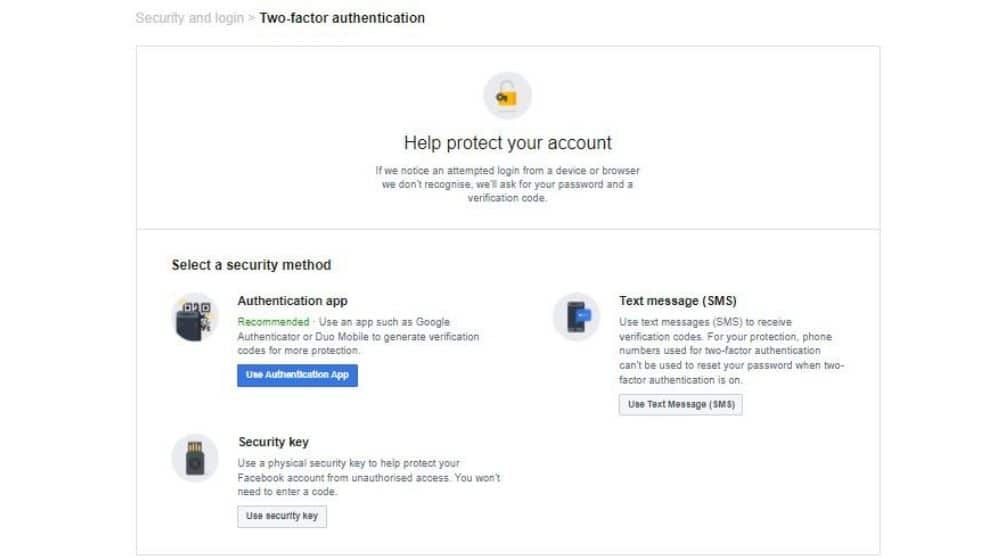
- Scroll down to Two-Factor Authentication, under Use Two-Factor Authentication, click Edit.
- If you enable the Authentication app, you can use any app such as Google Authenticator or Duo Mobile to generate verification codes for better privacy and security.
- If you enable Text messages (SMS), you can receive verification codes via SMS. However, any phone numbers used for two-factor authentication cannot be used to reset your password even when two-factor authentication is turned on.
- If you enable Security Key, you can use a physical security key to help protect your Facebook account from unauthorized access.
14. Hide Posts from Your Timeline
If you want to hide a post from your timeline:
- Go to your profile.
- Go to the post, you want to hide.
- Click or tap on the downward-facing arrow next to the post and select Hide from Timeline.
- Click on Hide from Timeline and the post will be hidden from your Timeline.
- The hidden post will still appear elsewhere on Facebook, but not on your Timeline. People who have shared that post can still view the post on their timeline.
- To unhide a post, go to your profile, click on the three dots, and open Activity Log. Under Your Posts, find the post you want to unhide, click on the three dots and select Unhide from Timeline.
15. Facebook Security Check-Up
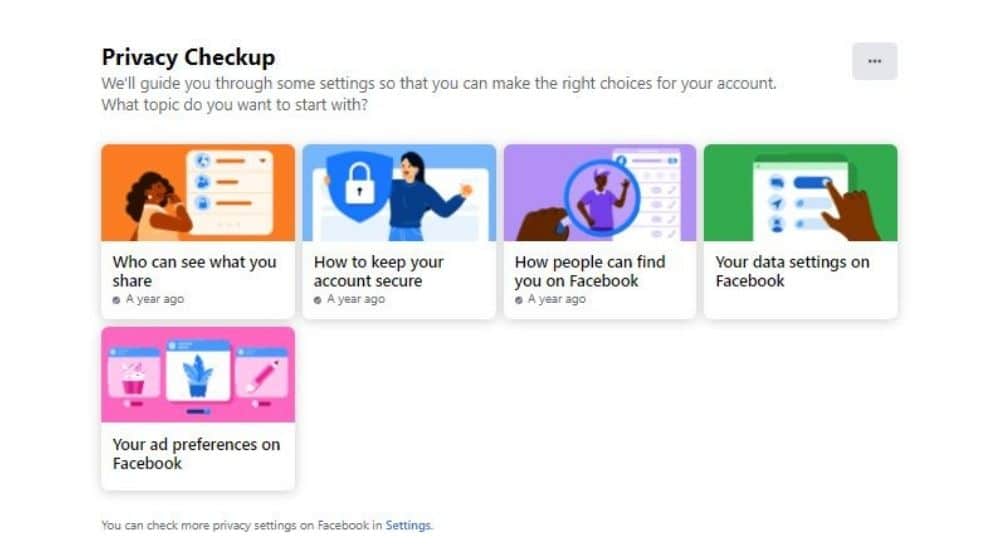
Facebook has its Privacy Check-Up feature that guides users to go through some of their privacy and security settings, so a user can review their settings and make sure they are sharing their content with who they want to share.
To access Privacy Check-Up:
- From the top right corner, access Settings and Privacy
- Click on Privacy Check-Up
- Who Can See What You Share: You can access Profile Information, Posts, Stories, and Blocking.
- How to Keep Your Account Secure: You can check your Password, turn on two-factor authentication, and manage login alerts.
- How People can find you on Facebook: Here you can check friend requests, phone numbers and email addresses, and settings for search engines.
- Your Data Settings on Facebook: Let’s you access the various options for Apps and Websites.
- Your Ad Preferences on Facebook: Let’s you learn more about advertisements on Facebook, Profile Information, and Social Interactions.
Stay Connected with ProPakistani
Get the latest tech news, telecom insights, and product launches wherever you prefer.
Add ProPakistani to Preferred Sources and see more of our stories in Google Search and Top Stories.